

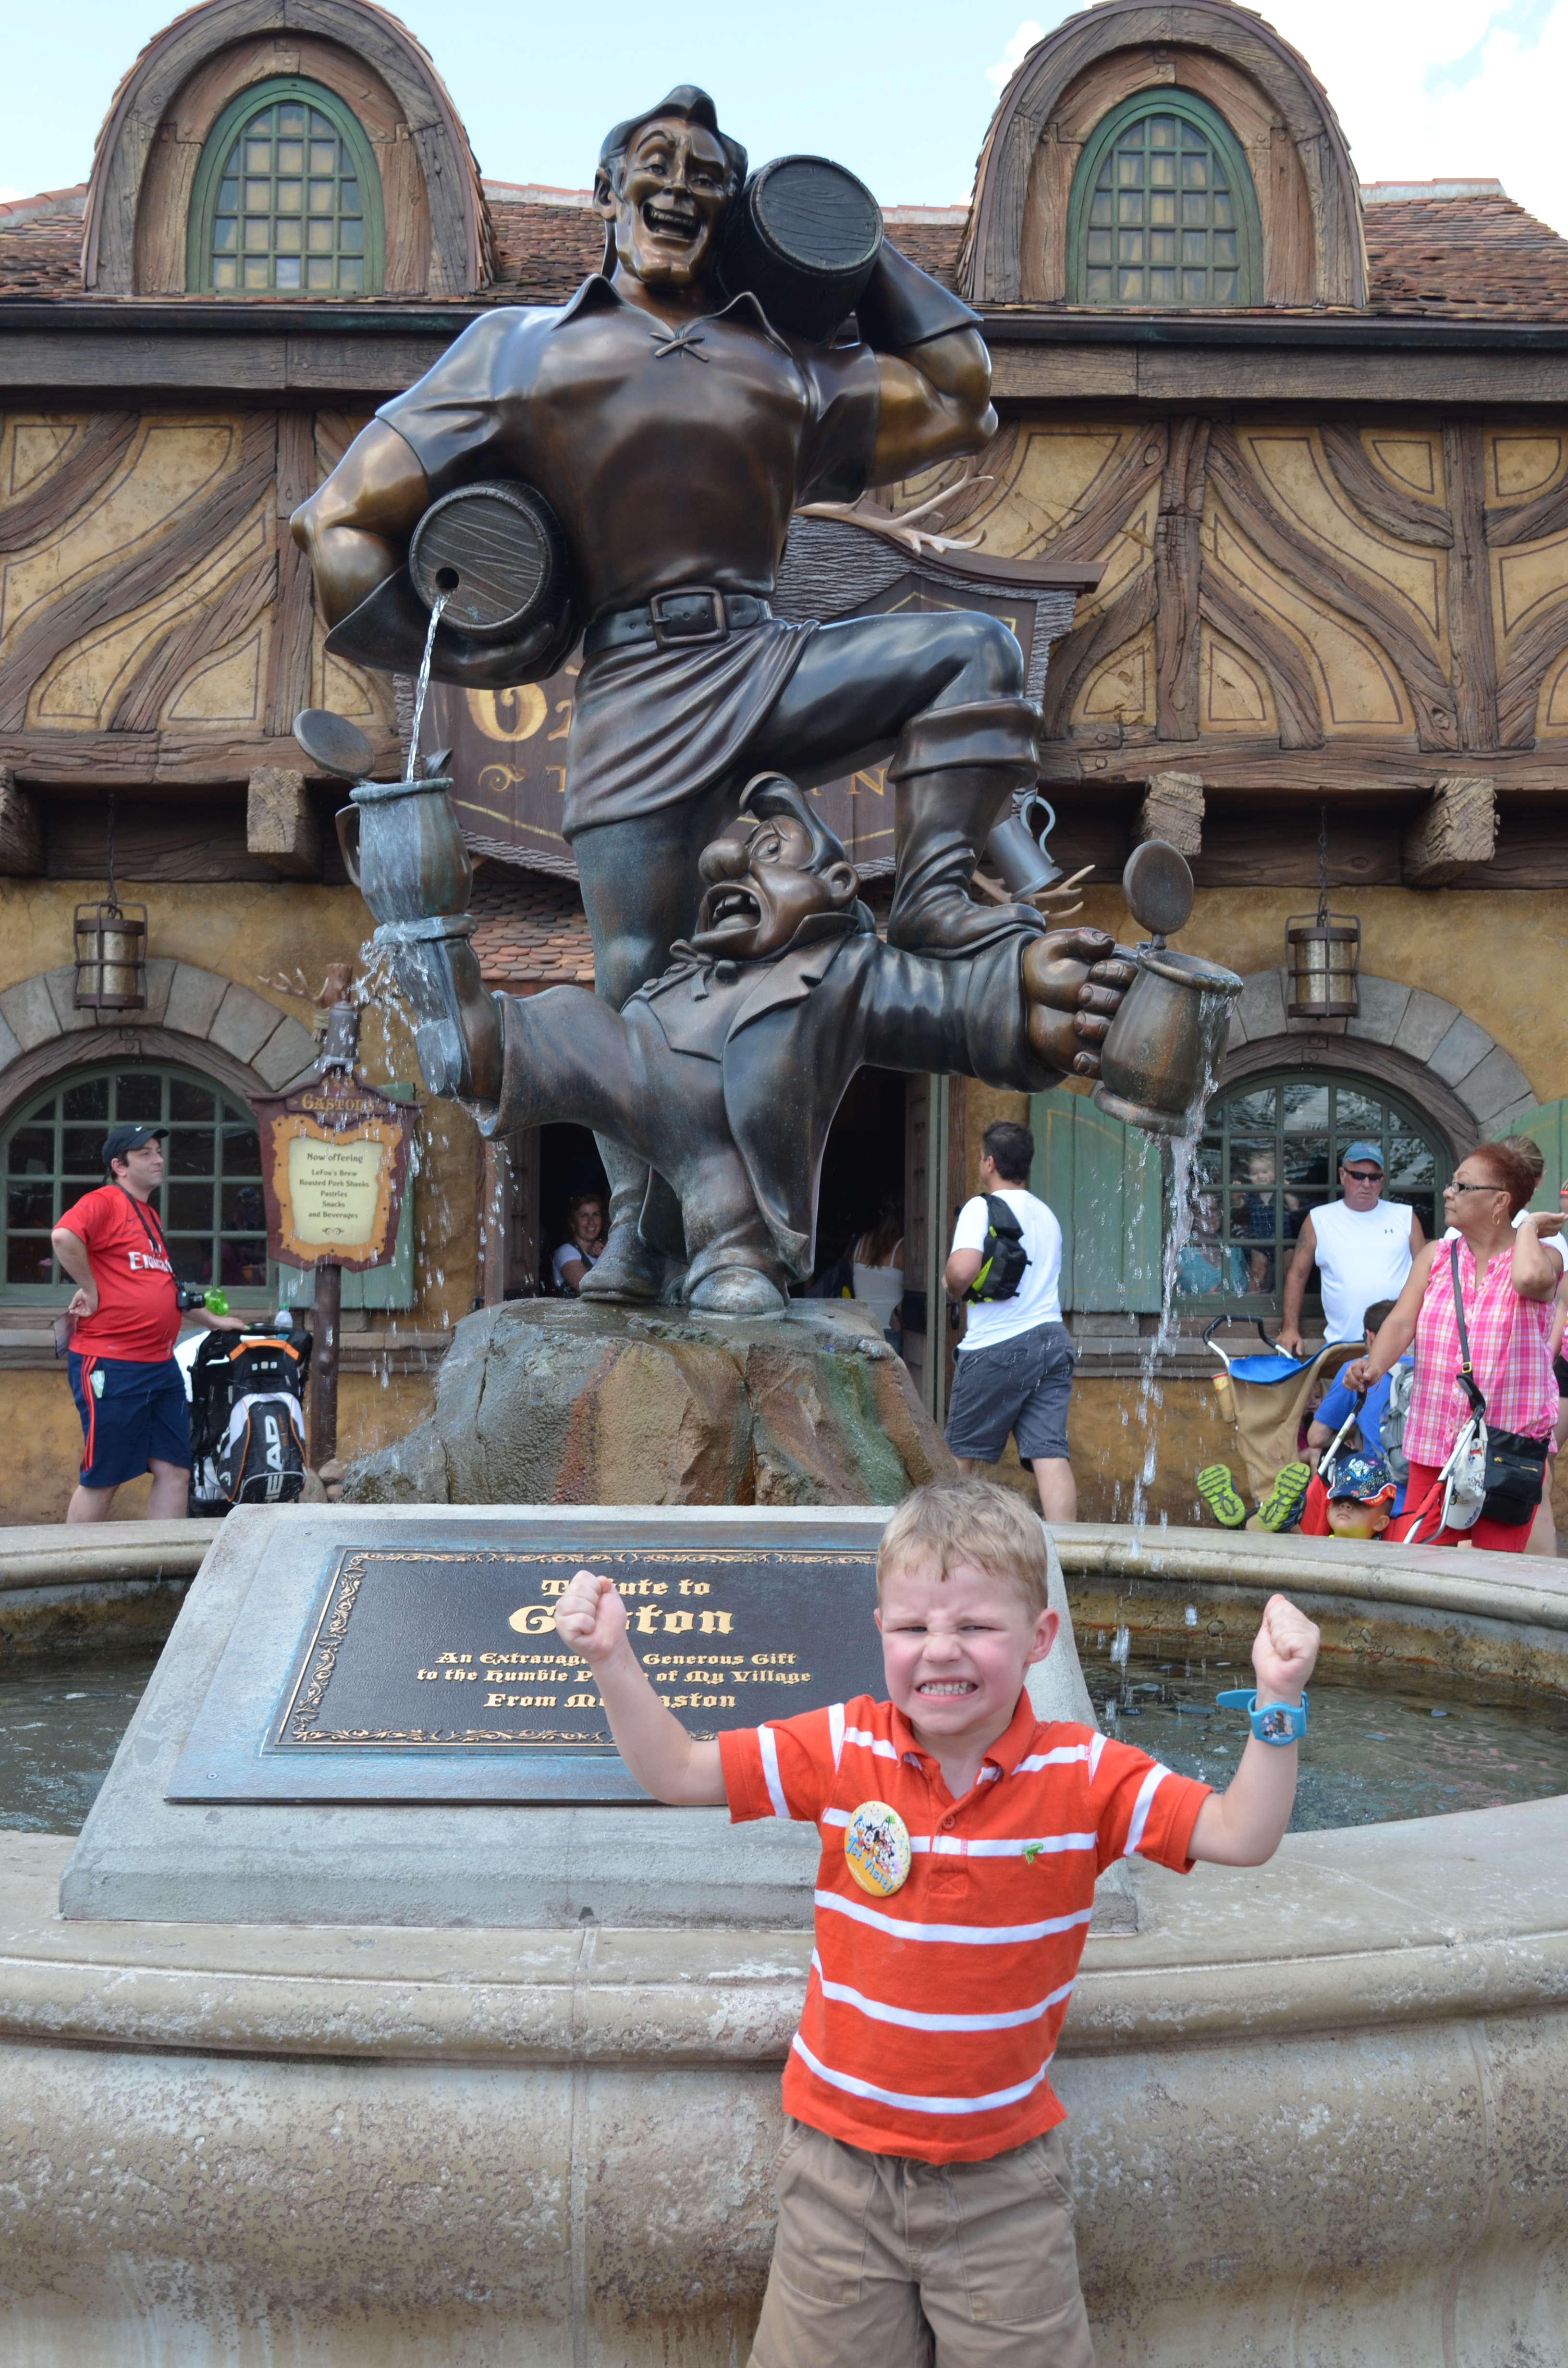
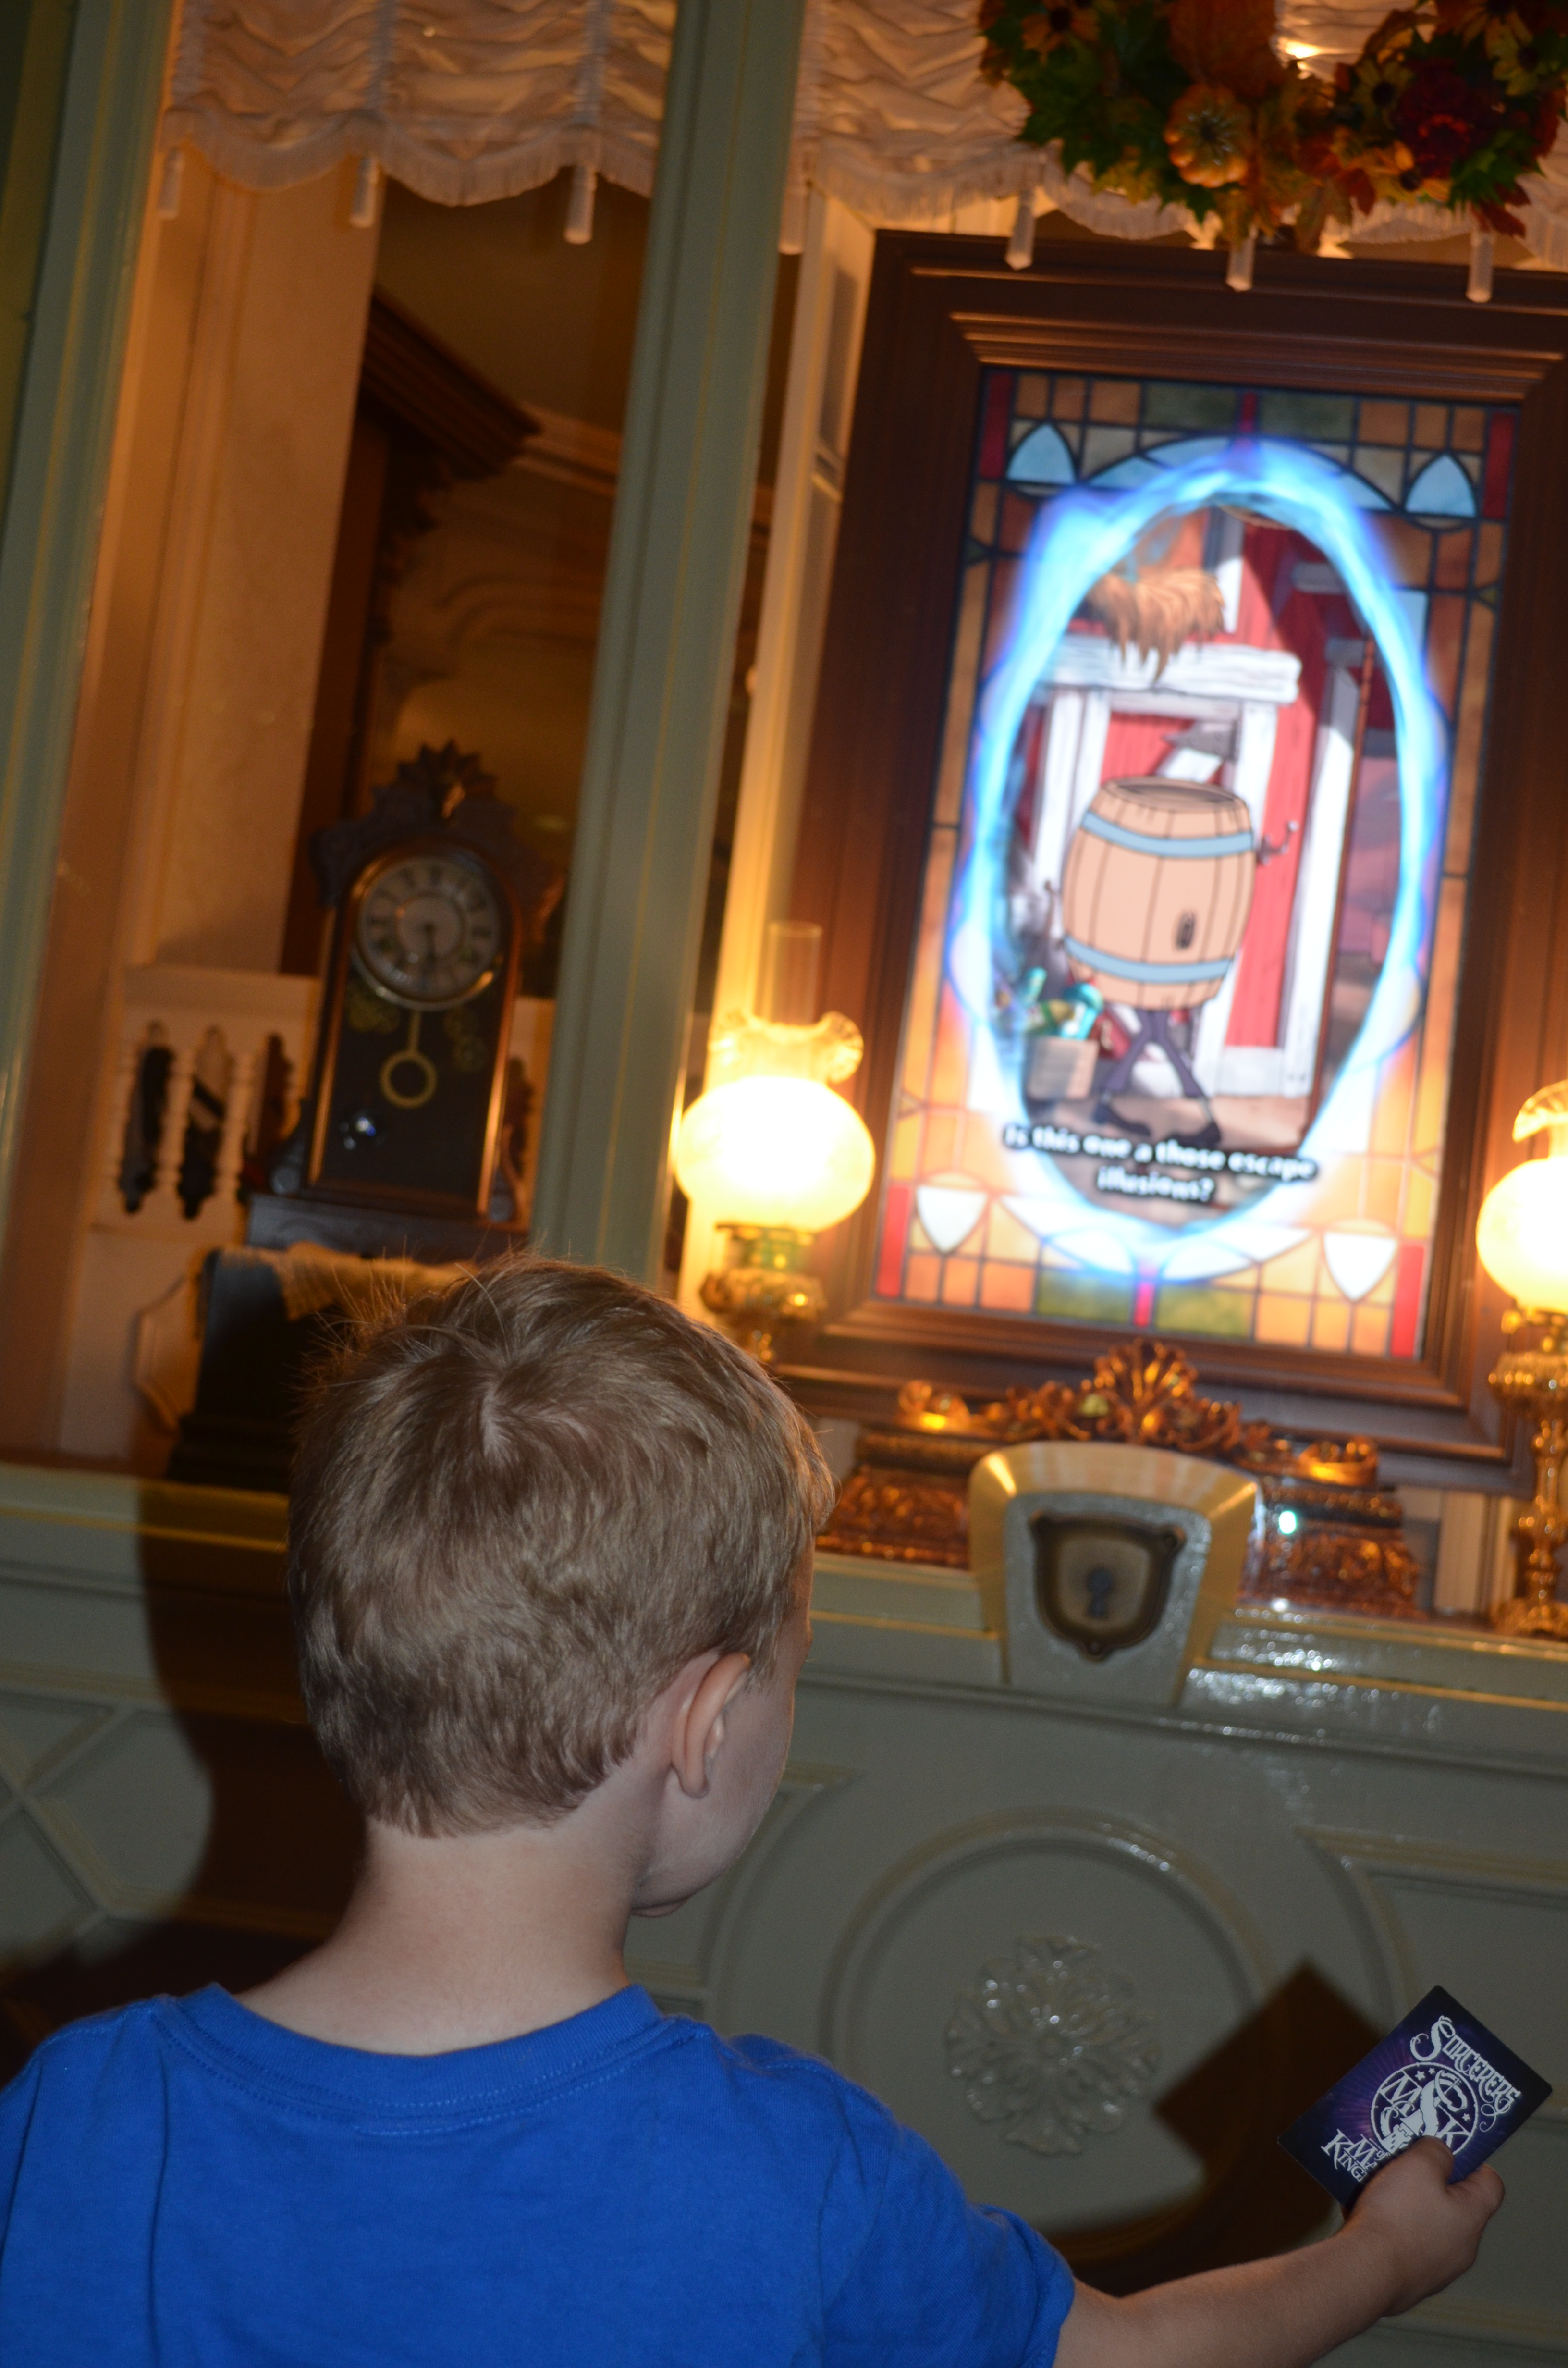
My son is a fan of the Disney Villains. I think it’s because where there are bad guys, there are battle scenes. While retail stores don’t have much for villains, the Disney Parks do. We went to Disney World a couple of weeks before his fourth birthday. At Disney World, his favorite bad guy (Gaston) has his own restaurant, meet-and-greet area, and even a fountain in his handsome likeness. Shows and nighttime attractions feature villains of all kinds. Both Wishes and Fantasmic have whole sequences full of villains. Hollywood Studios has a Villain-themed store: Villains in Vogue. And, at Magic Kingdom, you can help Merlin fight these scoundrels by playing Sorcerers of the Magic Kingdom–a dream-come-true for our little guy.

So, when it was time for his birthday party, we knew a villain-themed party would be just the thing. Again, there is not much available in stores, and not even a lot of ideas online, so I was pretty much left to my own devices.
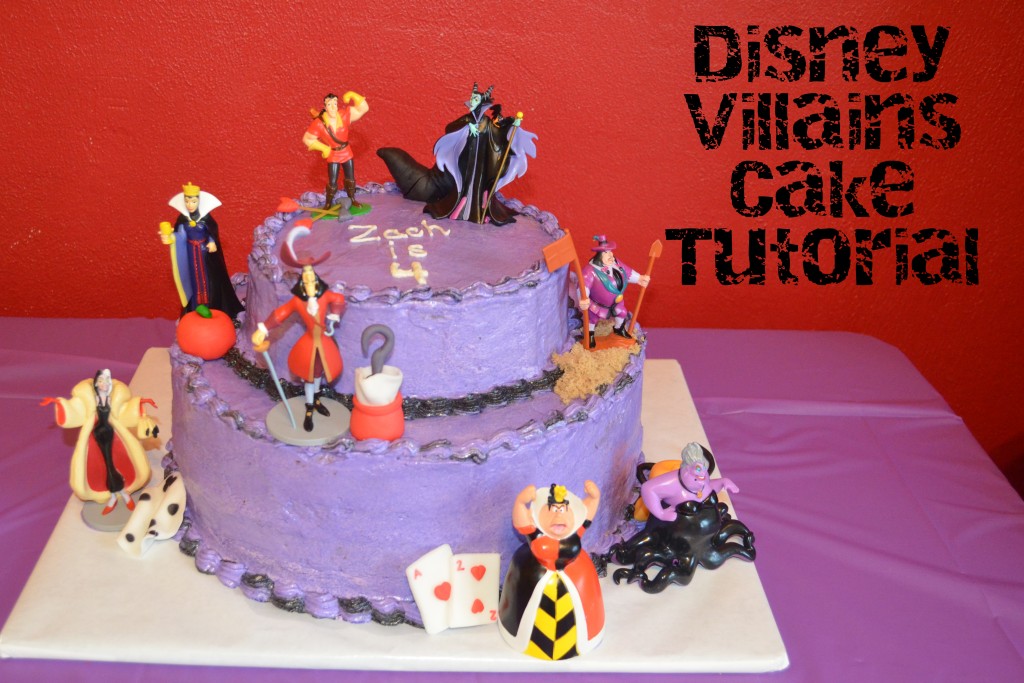
When I make birthday cakes, I like to frost the cakes with icing (because I like the flavor better than fondant) and decorate the cakes with fondant shapes (because I’m better at sculpting than piping). Don’t be intimidated by using fondant. If you can make shapes with Play Doh, you can do this.
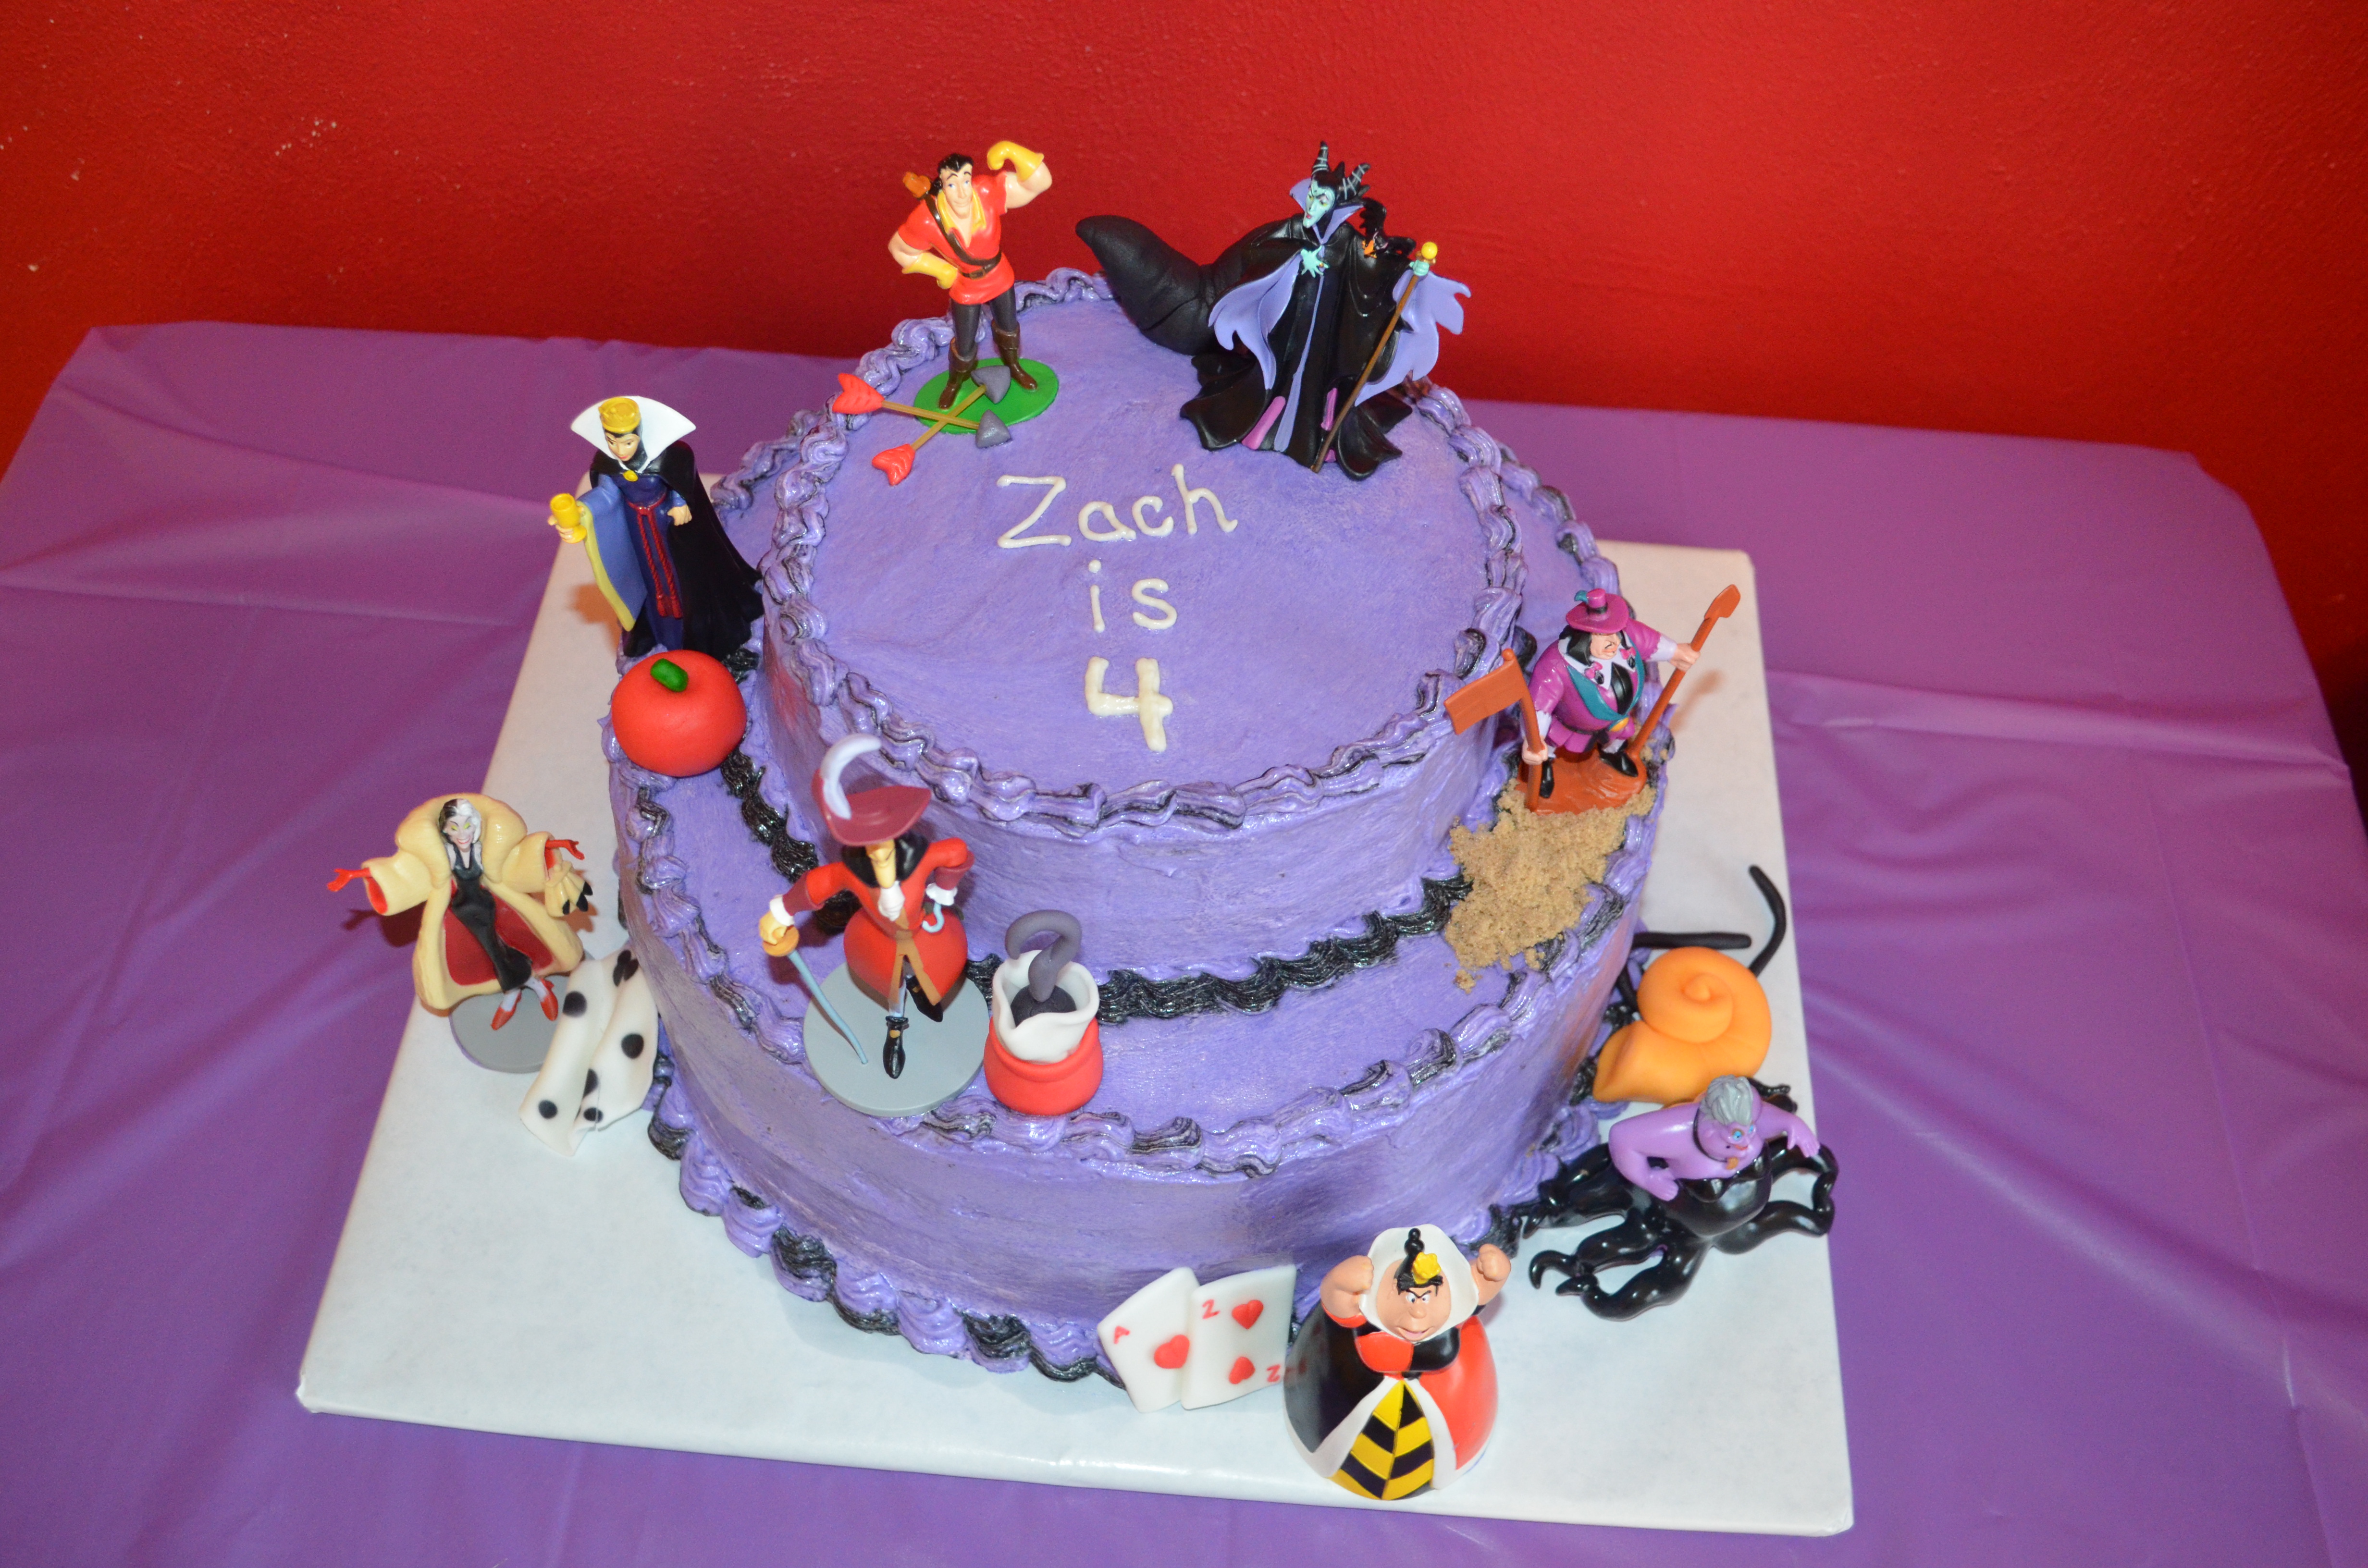
I knew I wanted to have a lot of different villains on his cake, so I ordered a Disney Villains Figurine Playset. It wasn’t available from the Disney Store anymore, but I did a search on Amazon and found a new one there. I used that and a few characters that our son already had.
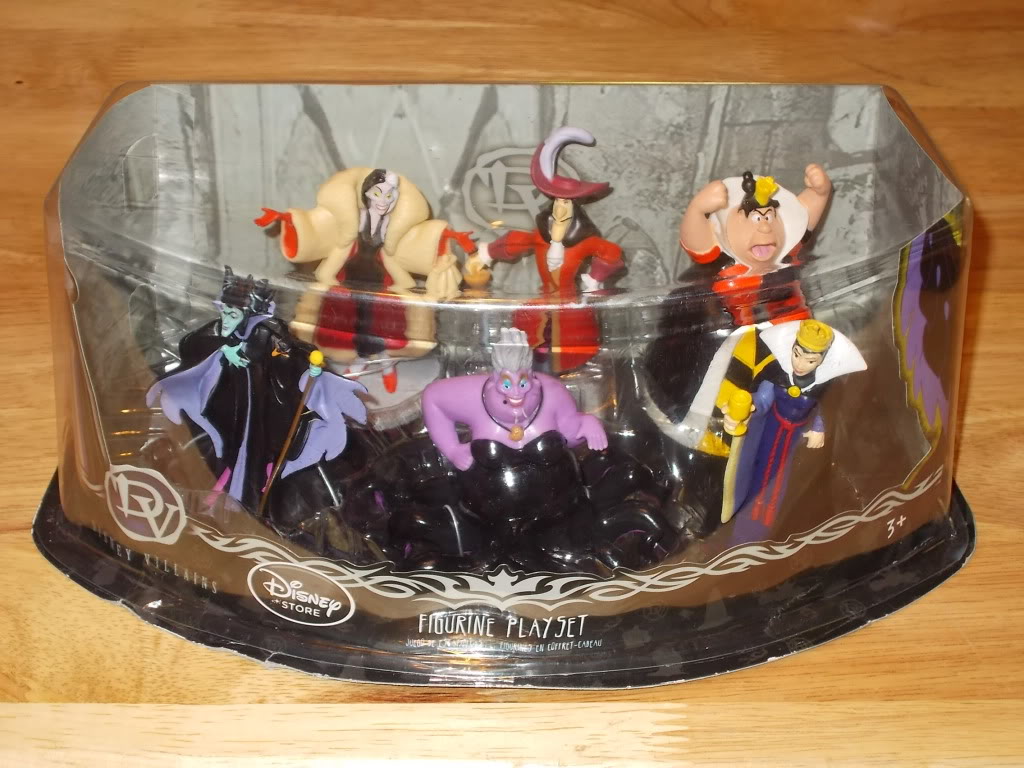
Image Credit: Photo Bucket
I was inspired by these fondant cake toppers on etsy because I knew I didn’t want to be shaping the actual villains. So, I made a list of the figurines that I would use and chose a symbol to represent each of them. Here is what I came up with:
Gaston – arrows
Maleficent – horns
Wicked Queen – apple
Captain Hook – hook
Governor Ratcliffe – dirt
Cruella DeVil – dalmation fur
Queen of Hearts – playing cards
Ursula – seashell necklace
I bought a box of Wilton rolled, white fondant at Walmart for about $6.50. It comes in a box and is found with their cake decorating supplies (not in the baking aisle). I looked at my list of items and determined the colors I would need. Then, I tore a piece off for each color color and colored it with gel food coloring. The Wilton (or any brand) of gel coloring adds less moisture than a liquid. I used a toothpick to apply the gel coloring. (Follow the box directions on how to color fondant.) When I wasn’t using the fondant, I had it tightly wrapped in plastic wrap. After making all of the items for the villains, I probably had about 3/4 of the box of fondant left. It didn’t take much to make these small cake toppers. To help different colors attach to one another, I wet my finger with water and rubbed a bit of moisture on the fondant, when needed.
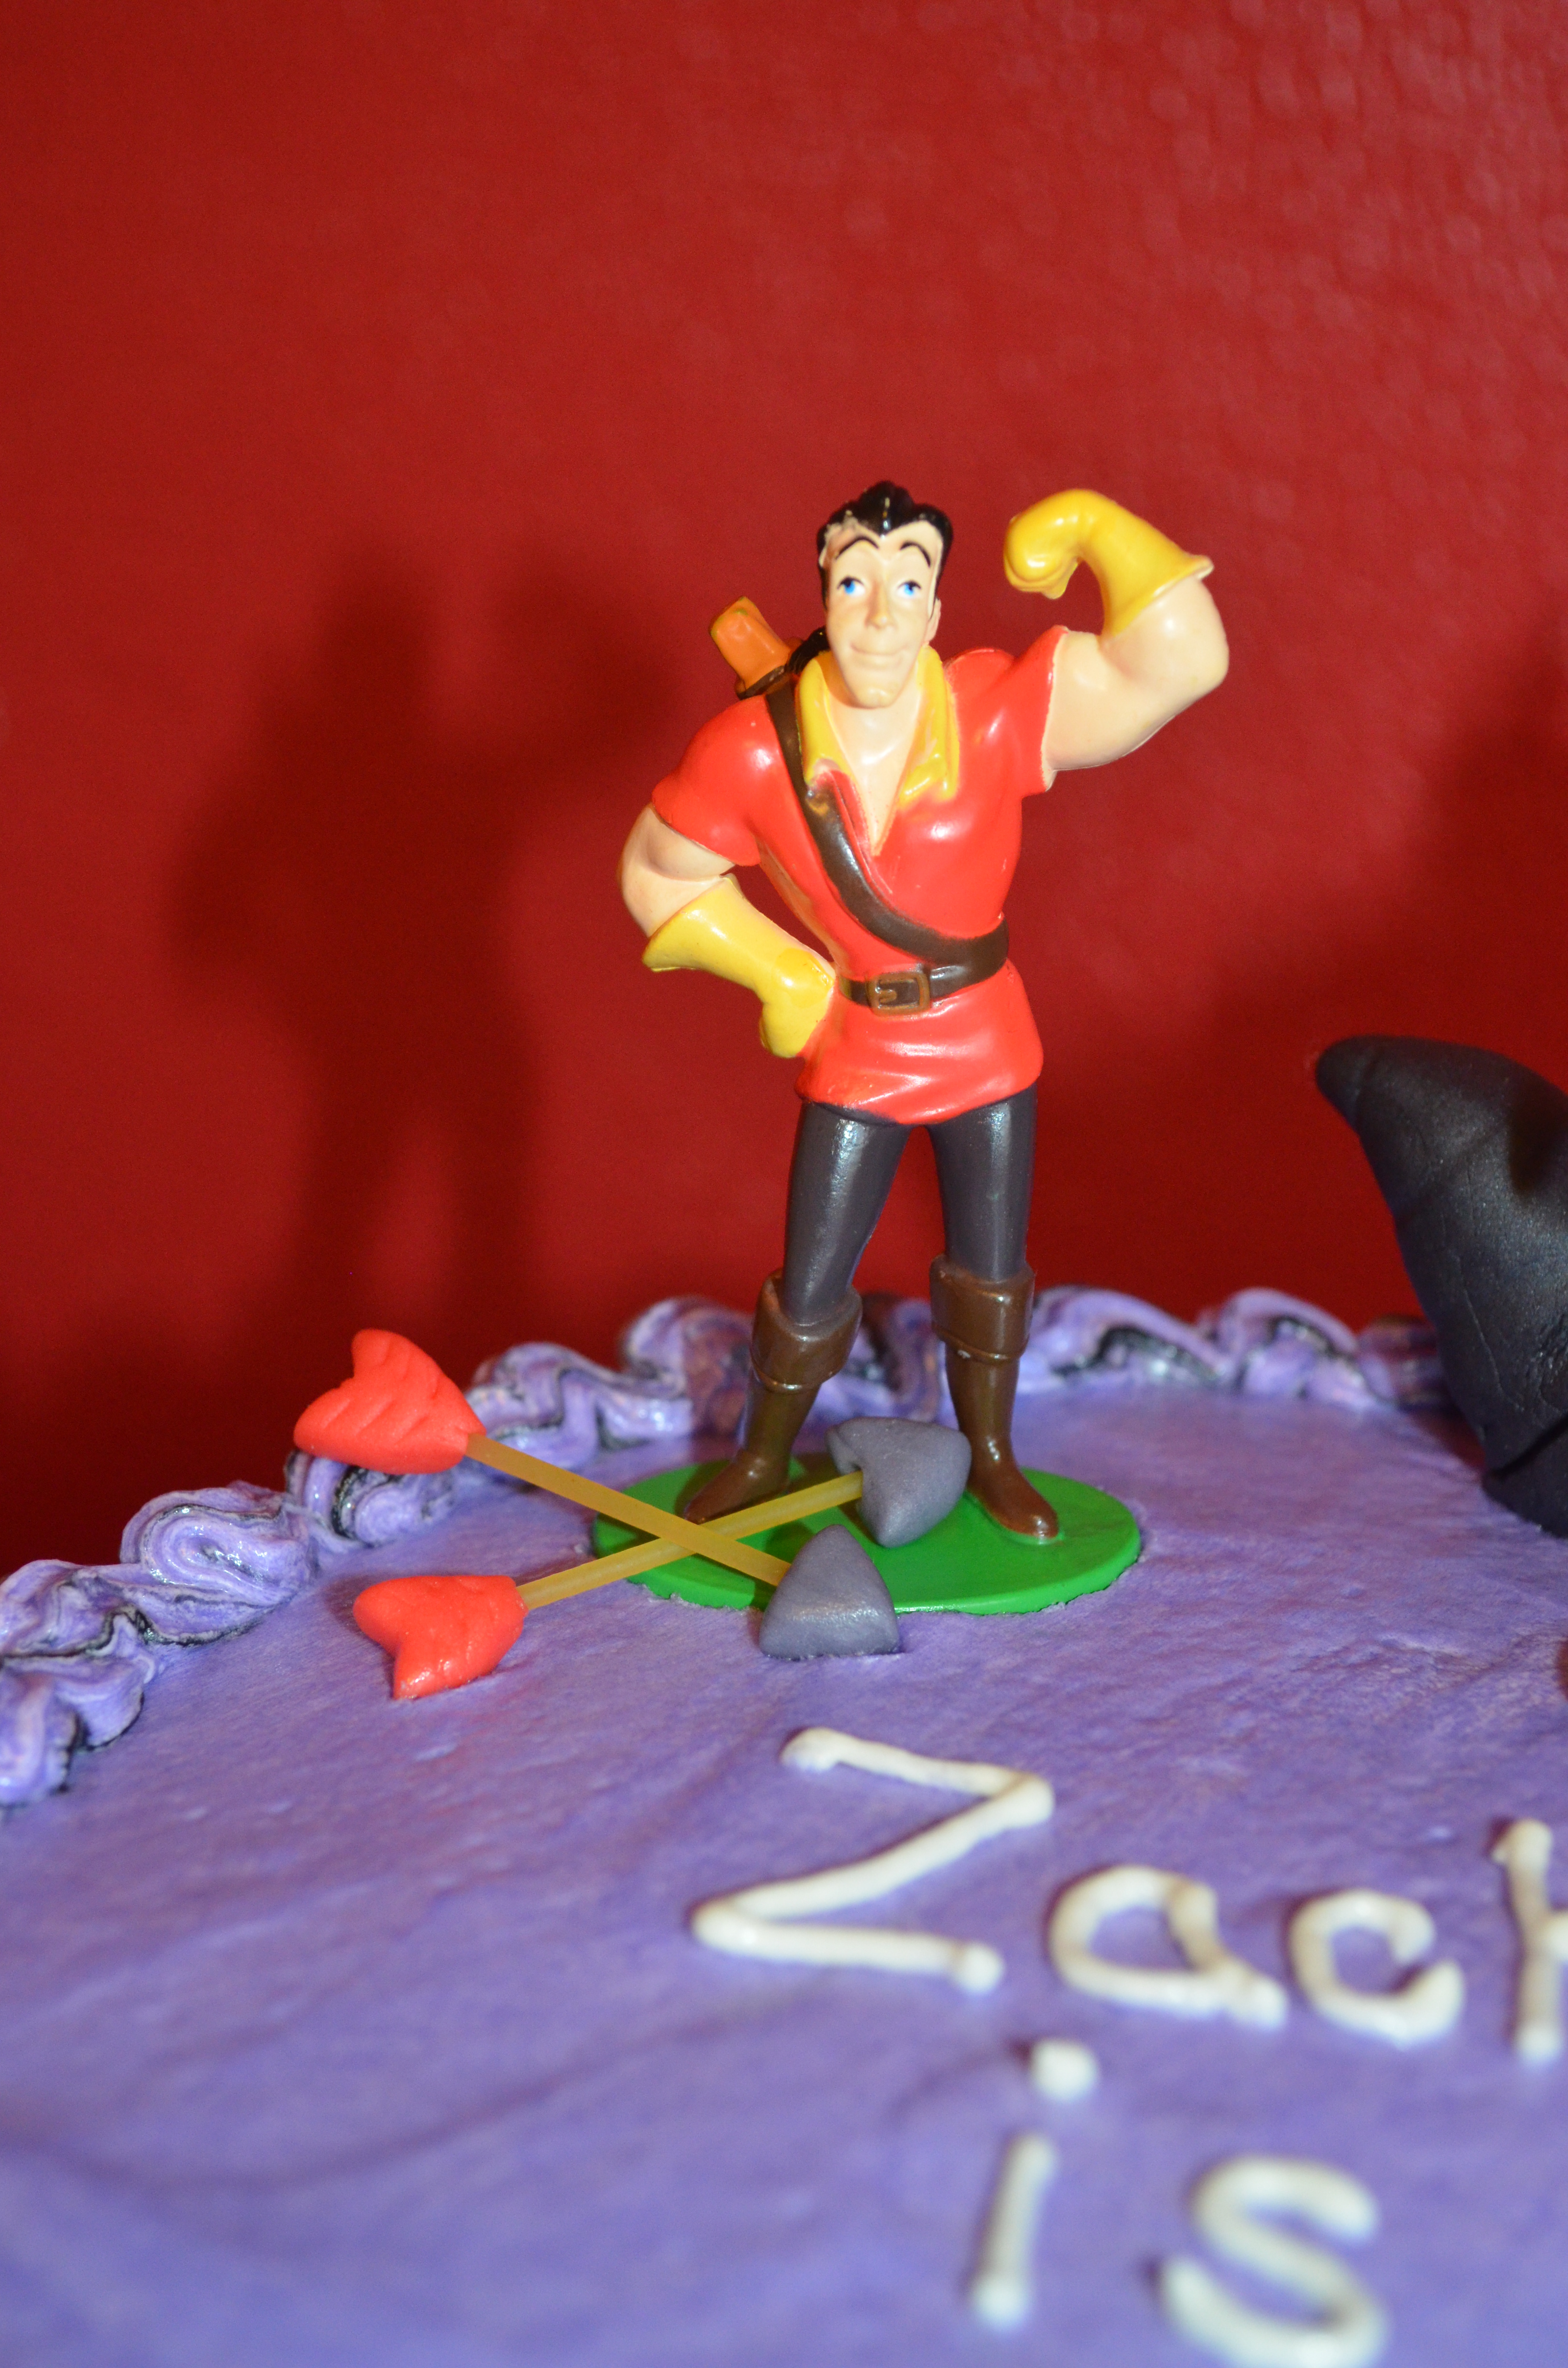 For Gaston, I made simple arrows, using thin spaghetti for the shaft, gray fondant for the tip, and red fondant for the back. I used a toothpick to make indentations on the red part to resemble a feather. My first idea was to cut a Fruit Roll-Up for the red part and I honestly think that would have been cuter; I just didn’t buy the Roll-Ups. Either option would work.
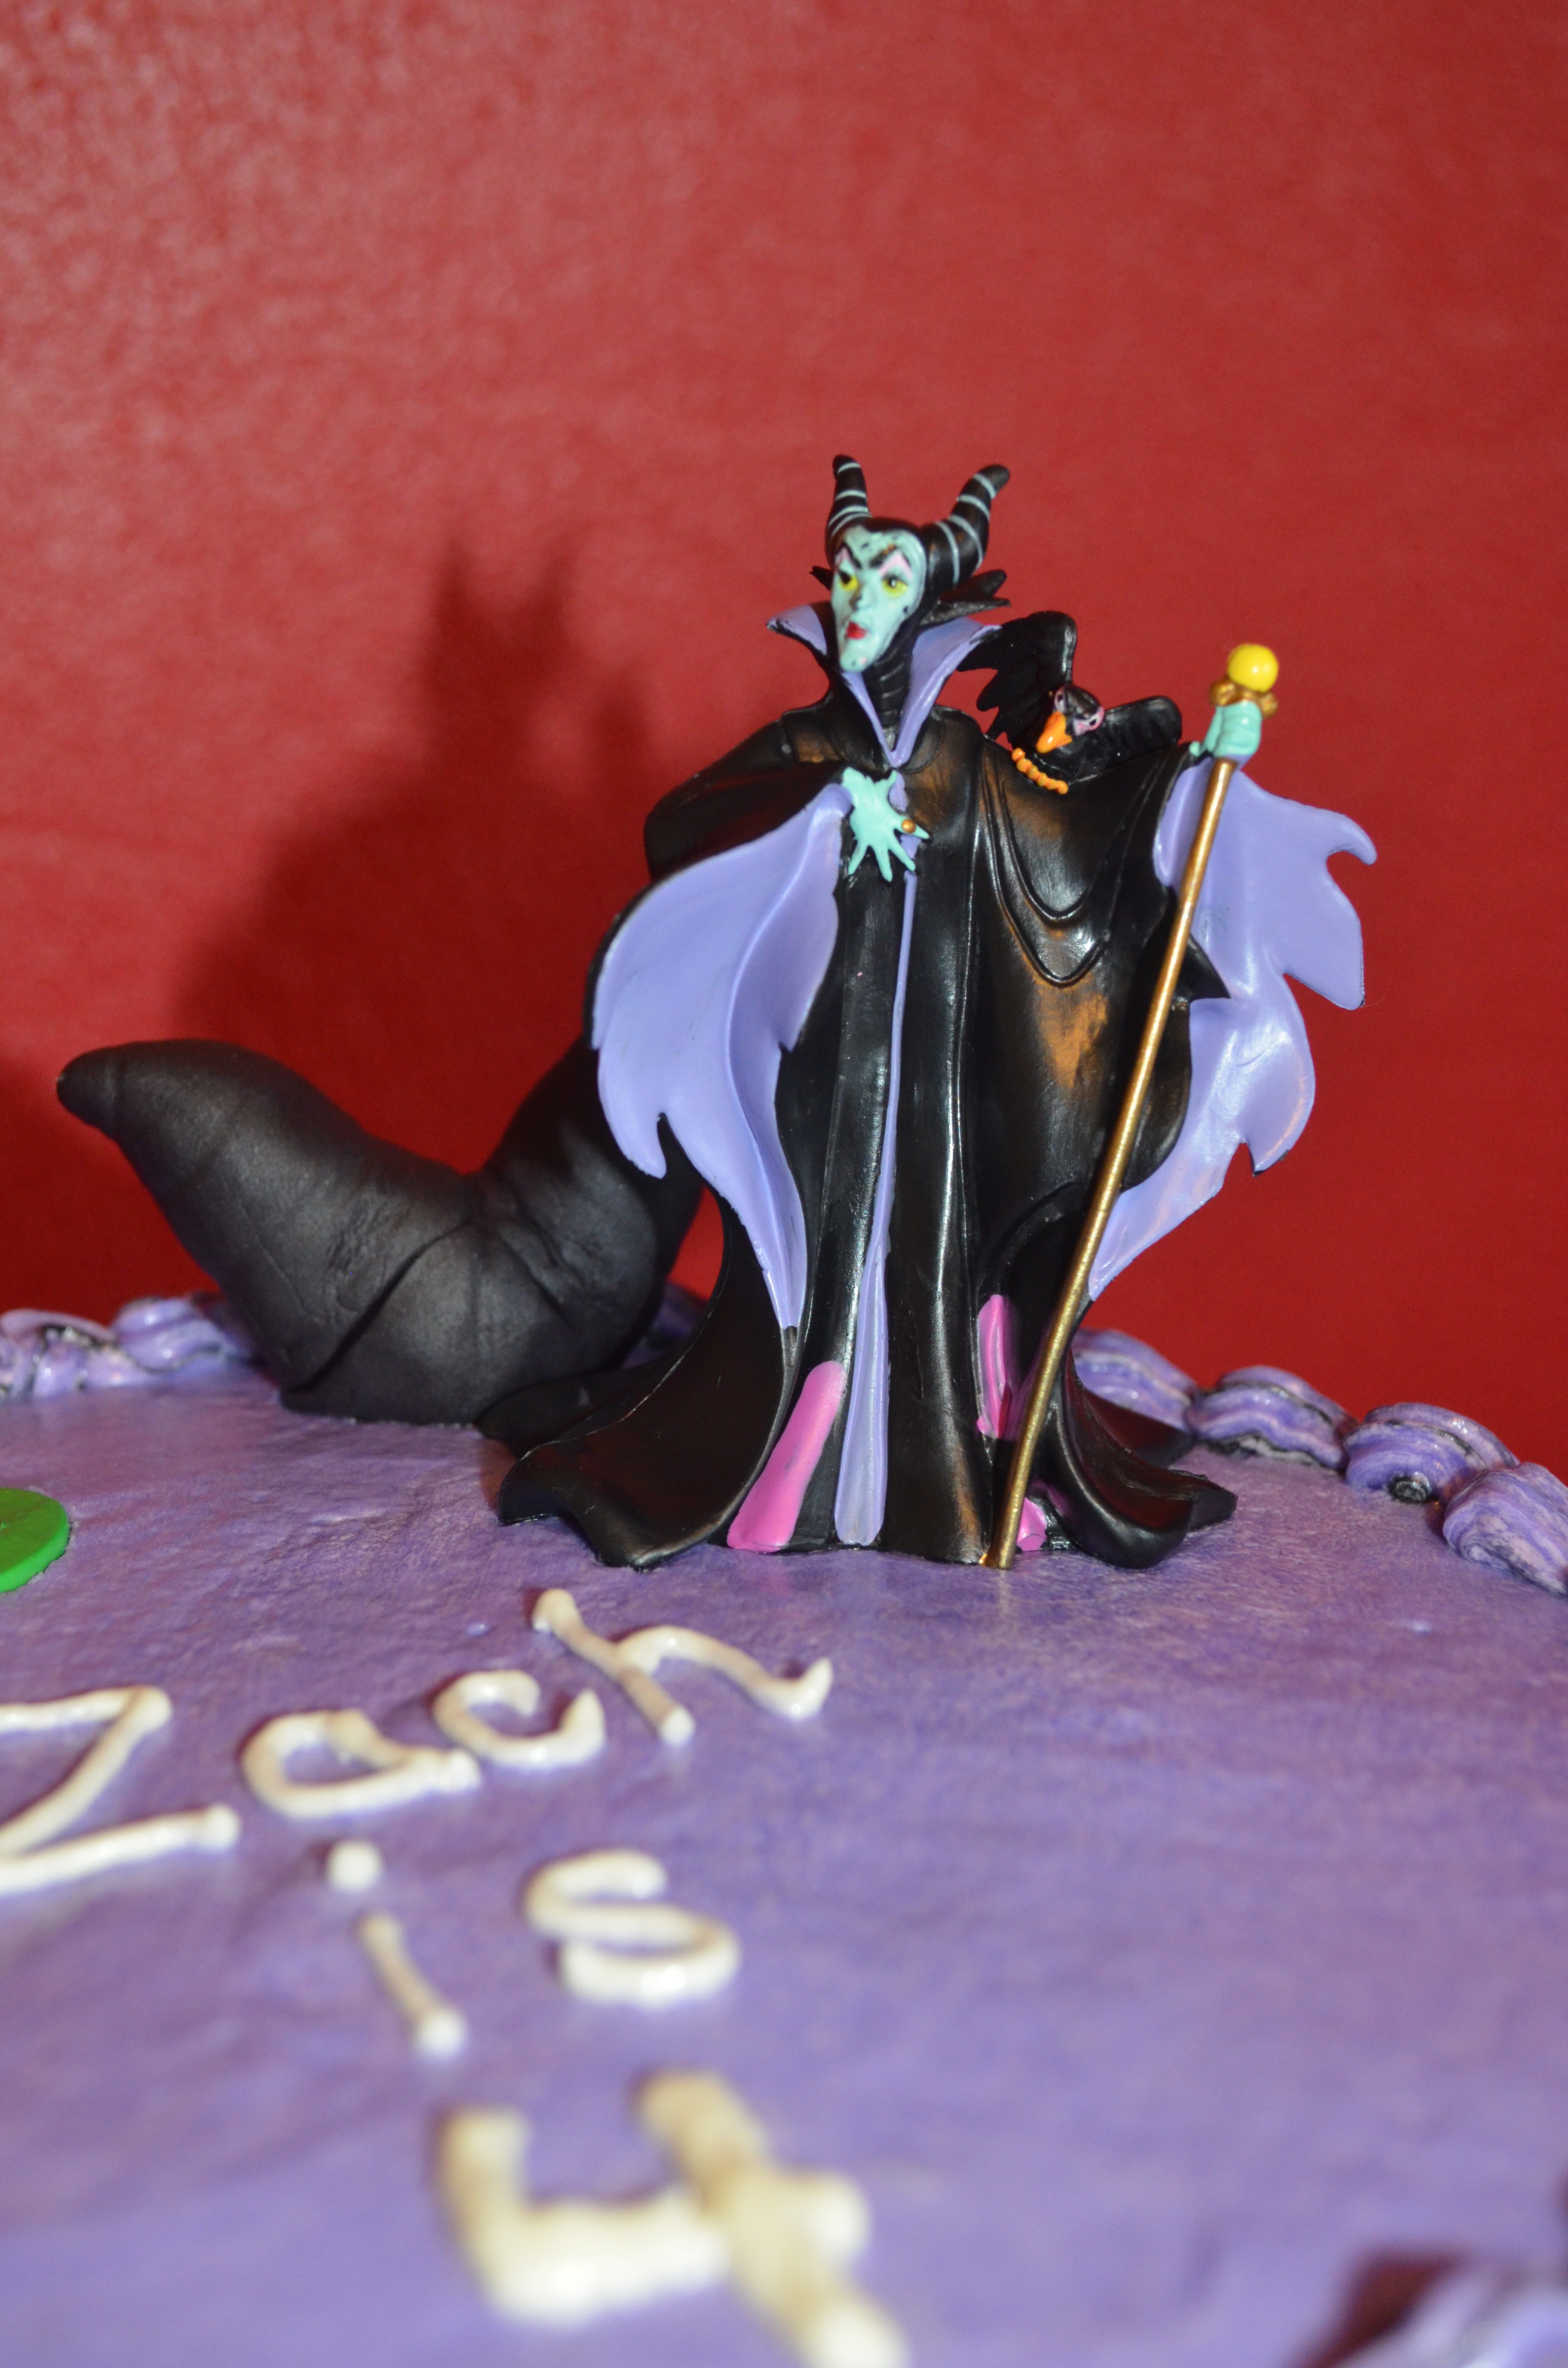 Maleficent’s horns were entirely black. It takes a lot of food coloring to get a true black color. As I said, I usually use a toothpick to apply a little bit of gel food coloring, but for deep, dark colors, I dip the tip of a butter knife into the gel and apply it that way. Her horns are three pieces. I had trouble getting them to stay together. So, I halfway inserted a piece of thin spaghetti into the base of the headpiece and pushed a horn onto the remaining part of the spaghetti. I repeated that on the other side to help hold both horns onto the base. Again, I pressed into the fondant with a toothpick to create the lines that go up each horn.
 The Wicked Queen’s apple was one of the easiest pieces to make. I rolled a ball with red fondant, pressed a dent into the top center, and used a tiny bit of green for a stem.
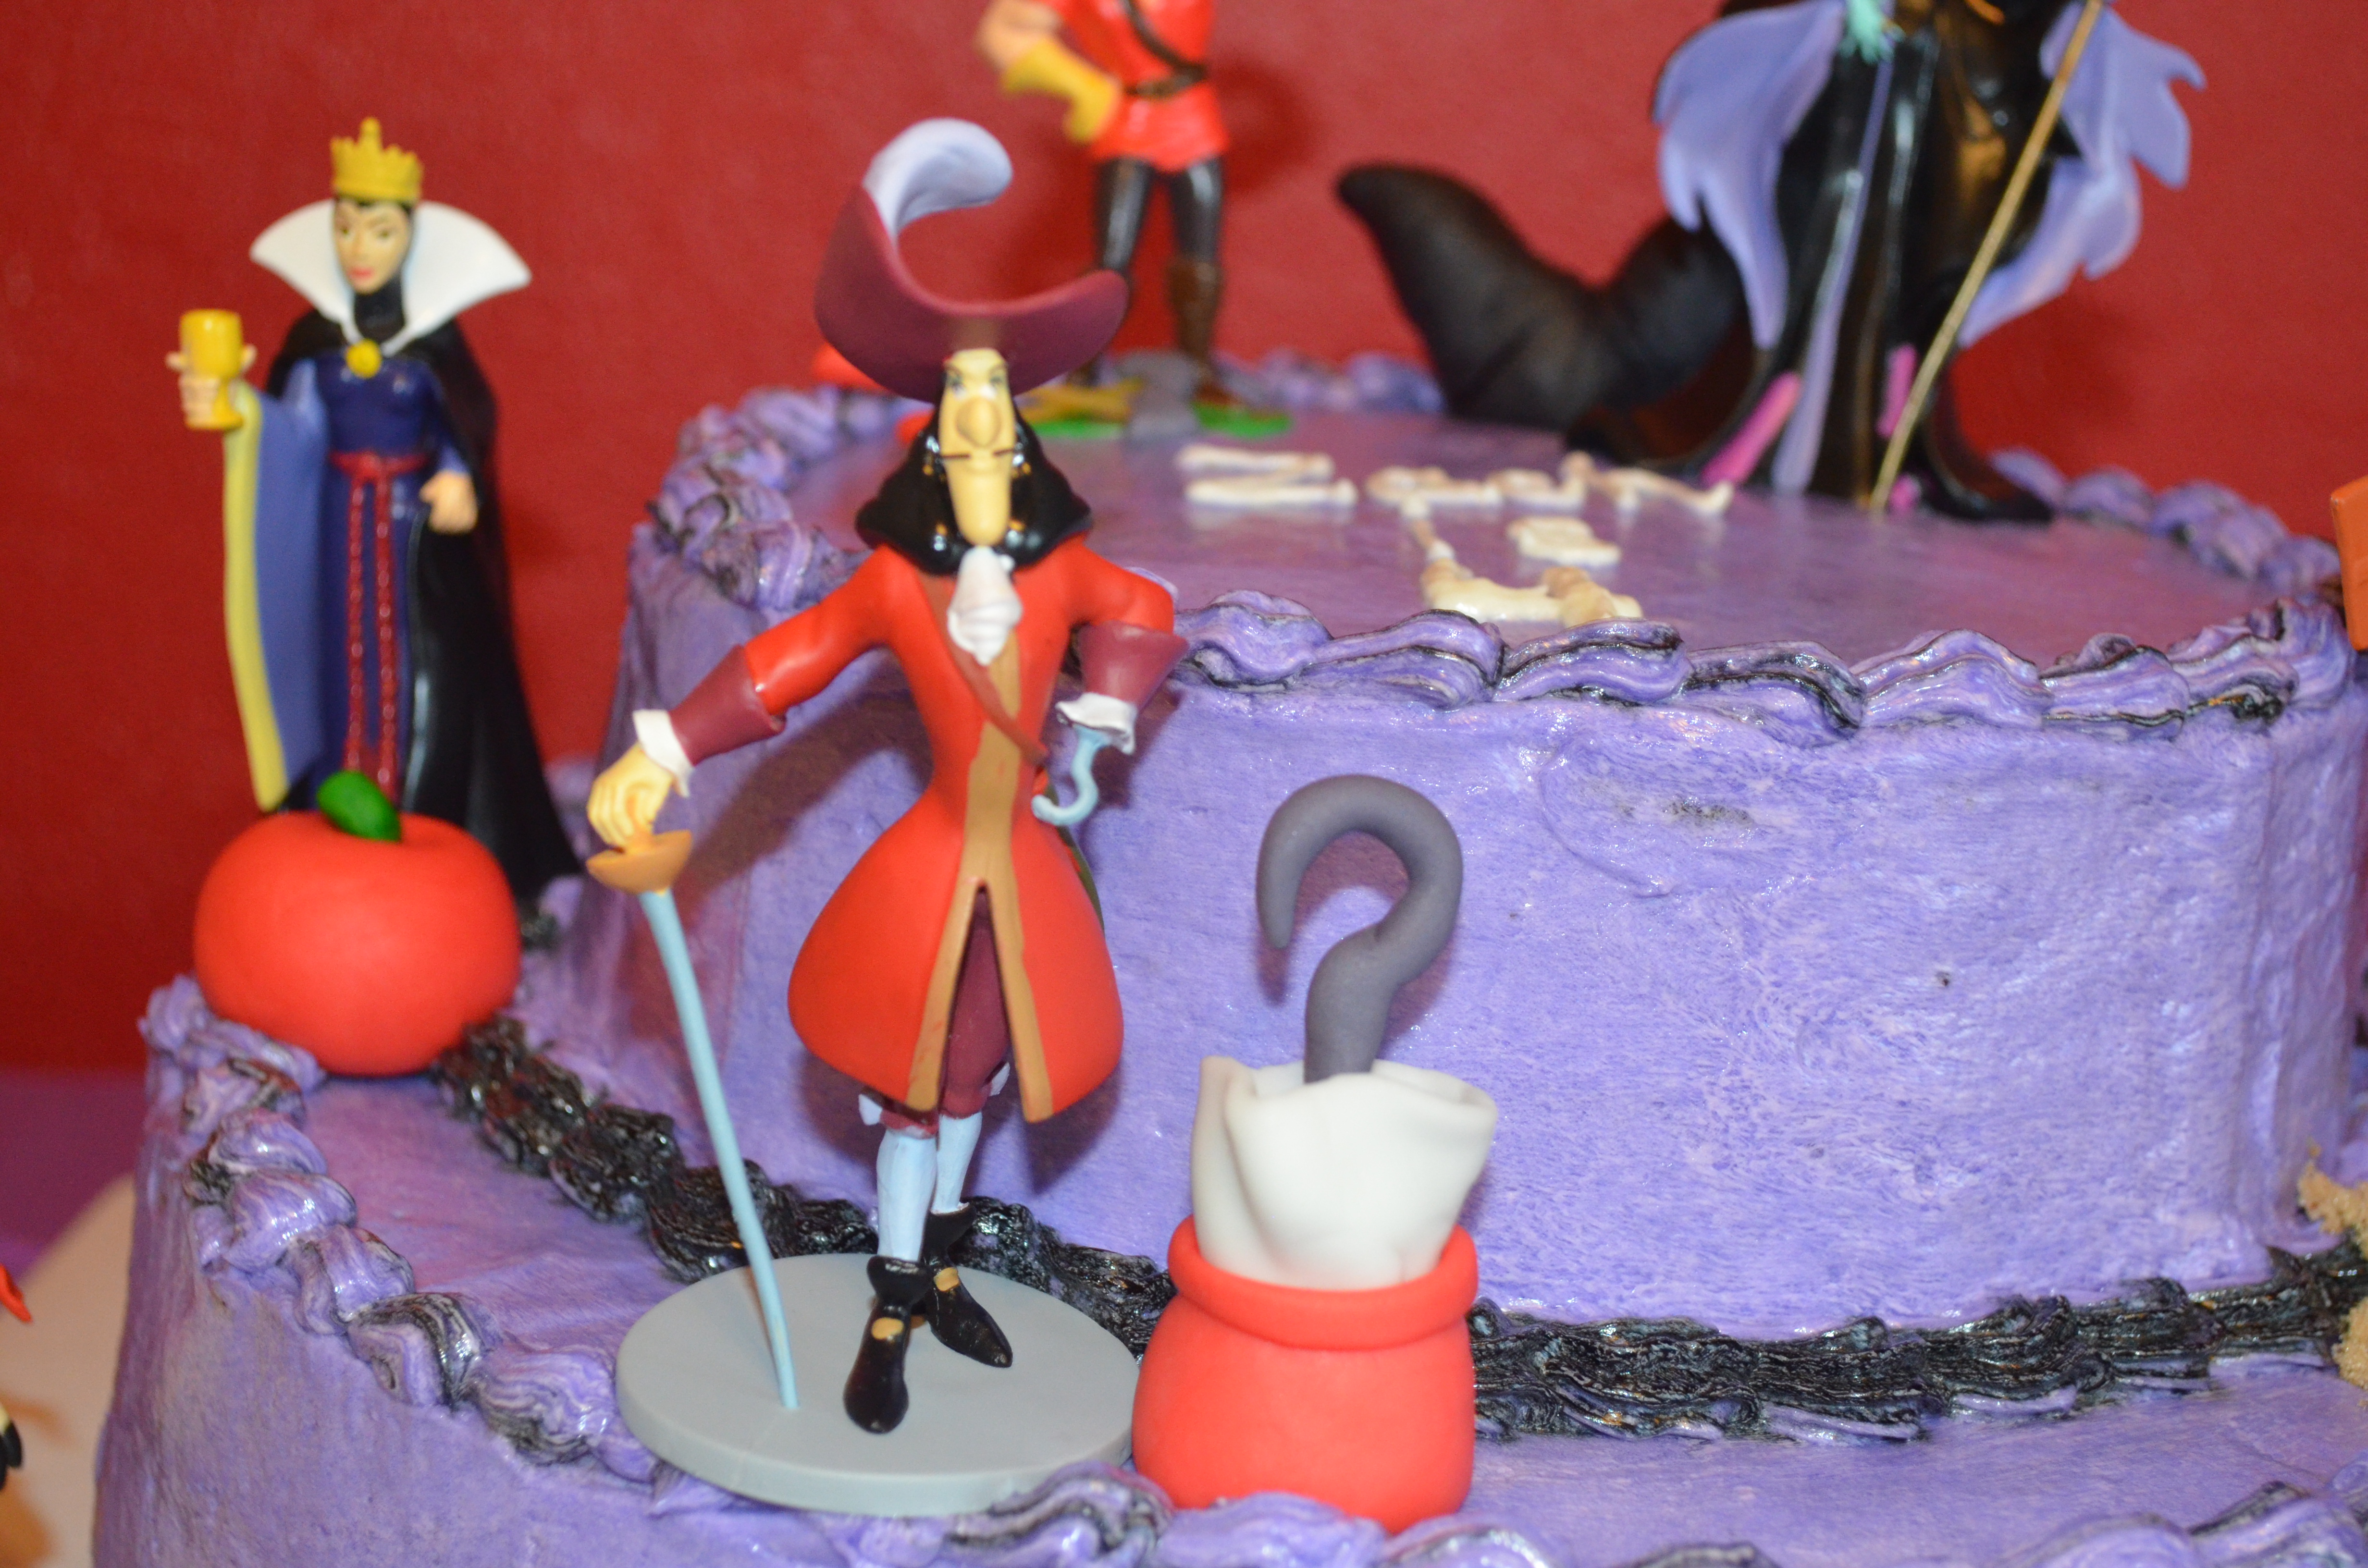 Captain Hook used gray, white, and red fondant. I shaped a rounded cylinder for the end of his sleeve and made a thin, snake shape to form a rim around it. In the center of the rim, I put a small half-sphere shape of white to help strengthen the ruffly part of his sleeve, and to give me something to put the hook into. I rolled out a thin piece of white and made it look wavy like a ruffle as I attached it inside the red rim. The gray was rolled like a snake and formed into a hook shape. I put a piece of spaghetti into the end of it to attach it to the sleeve. I allowed the hook to dry on waxed paper for a couple of hours before I put stuck the other end of the spaghetti into the sleeve. Letting that thin piece dry helped ensure that it wouldn’t droop once I stood it upright.
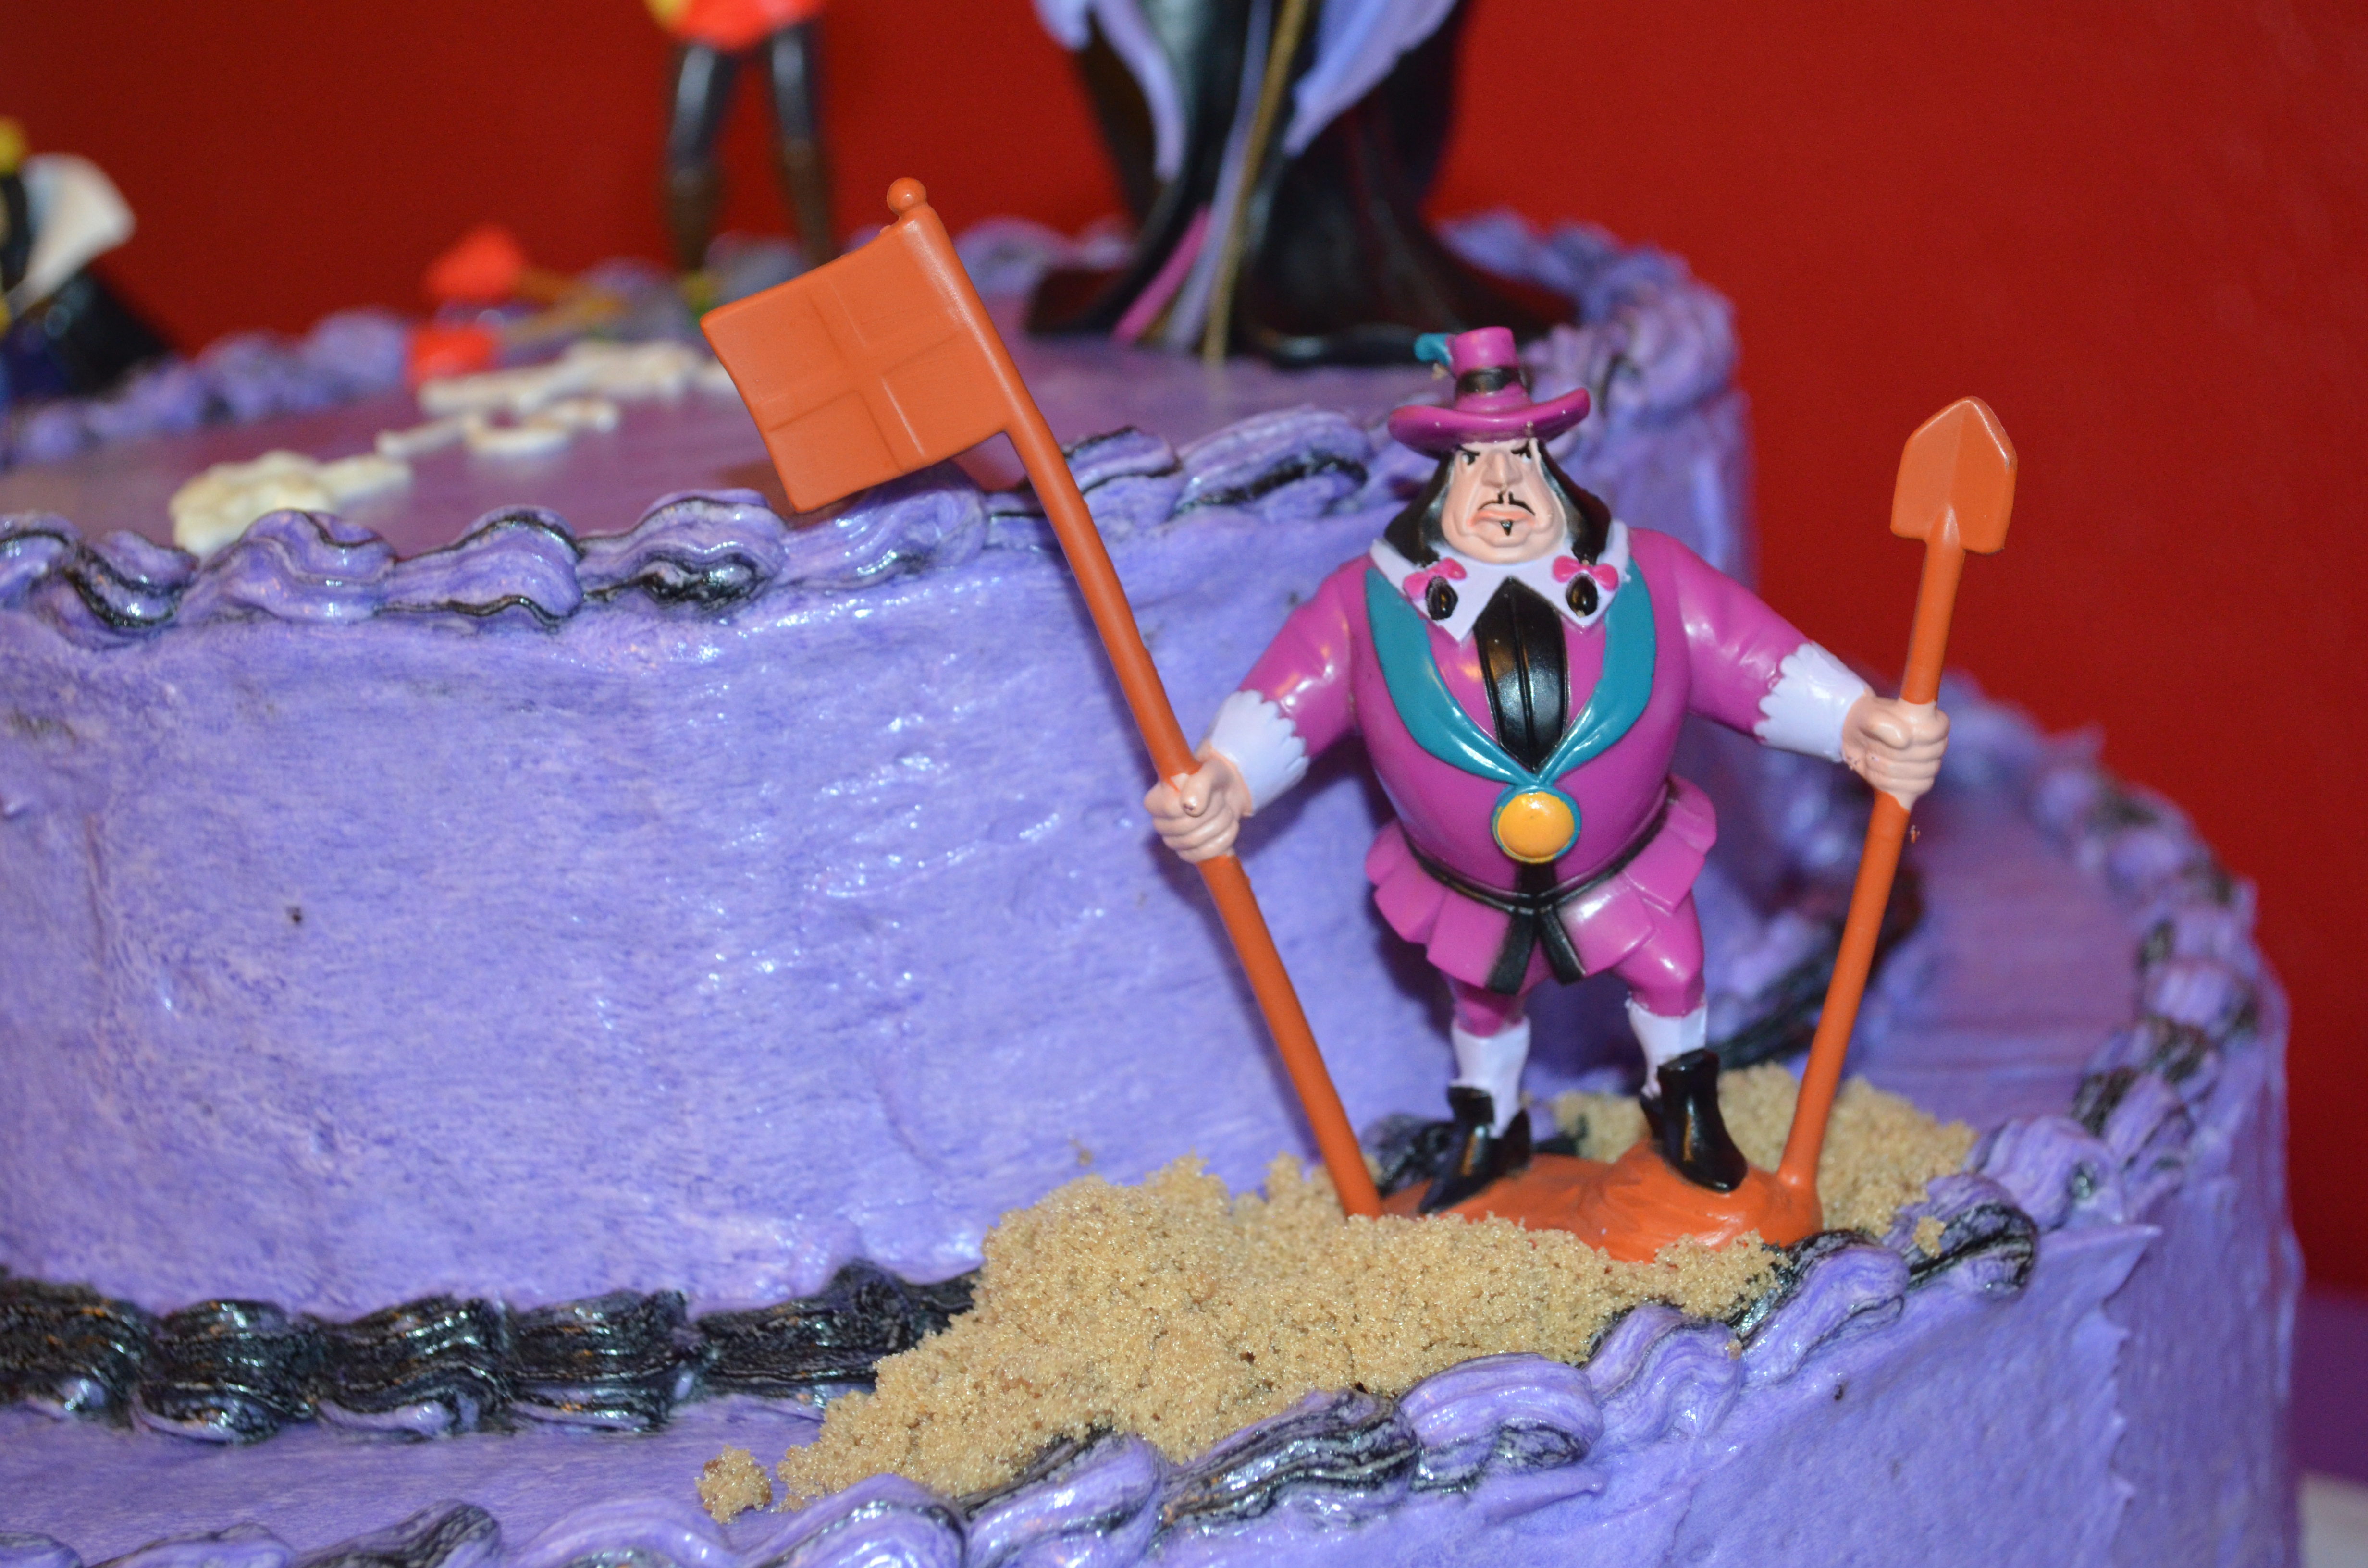 My son was in a bit of a Pocahontas phase at the time, so Governor Ratcliffe was a must. I sprinkled brown sugar around him to act as the dirt.
 Cruella de Vil’s dalmation fur was fun and easy to make. I slightly flattened a ball of white fondant. On top of that, I put little black balls of fondant here and there and flattened them slightly too. Then, I rolled it all out, until the white was thin and the black circles were blended in. I even included a Hidden Mickey in the spots!
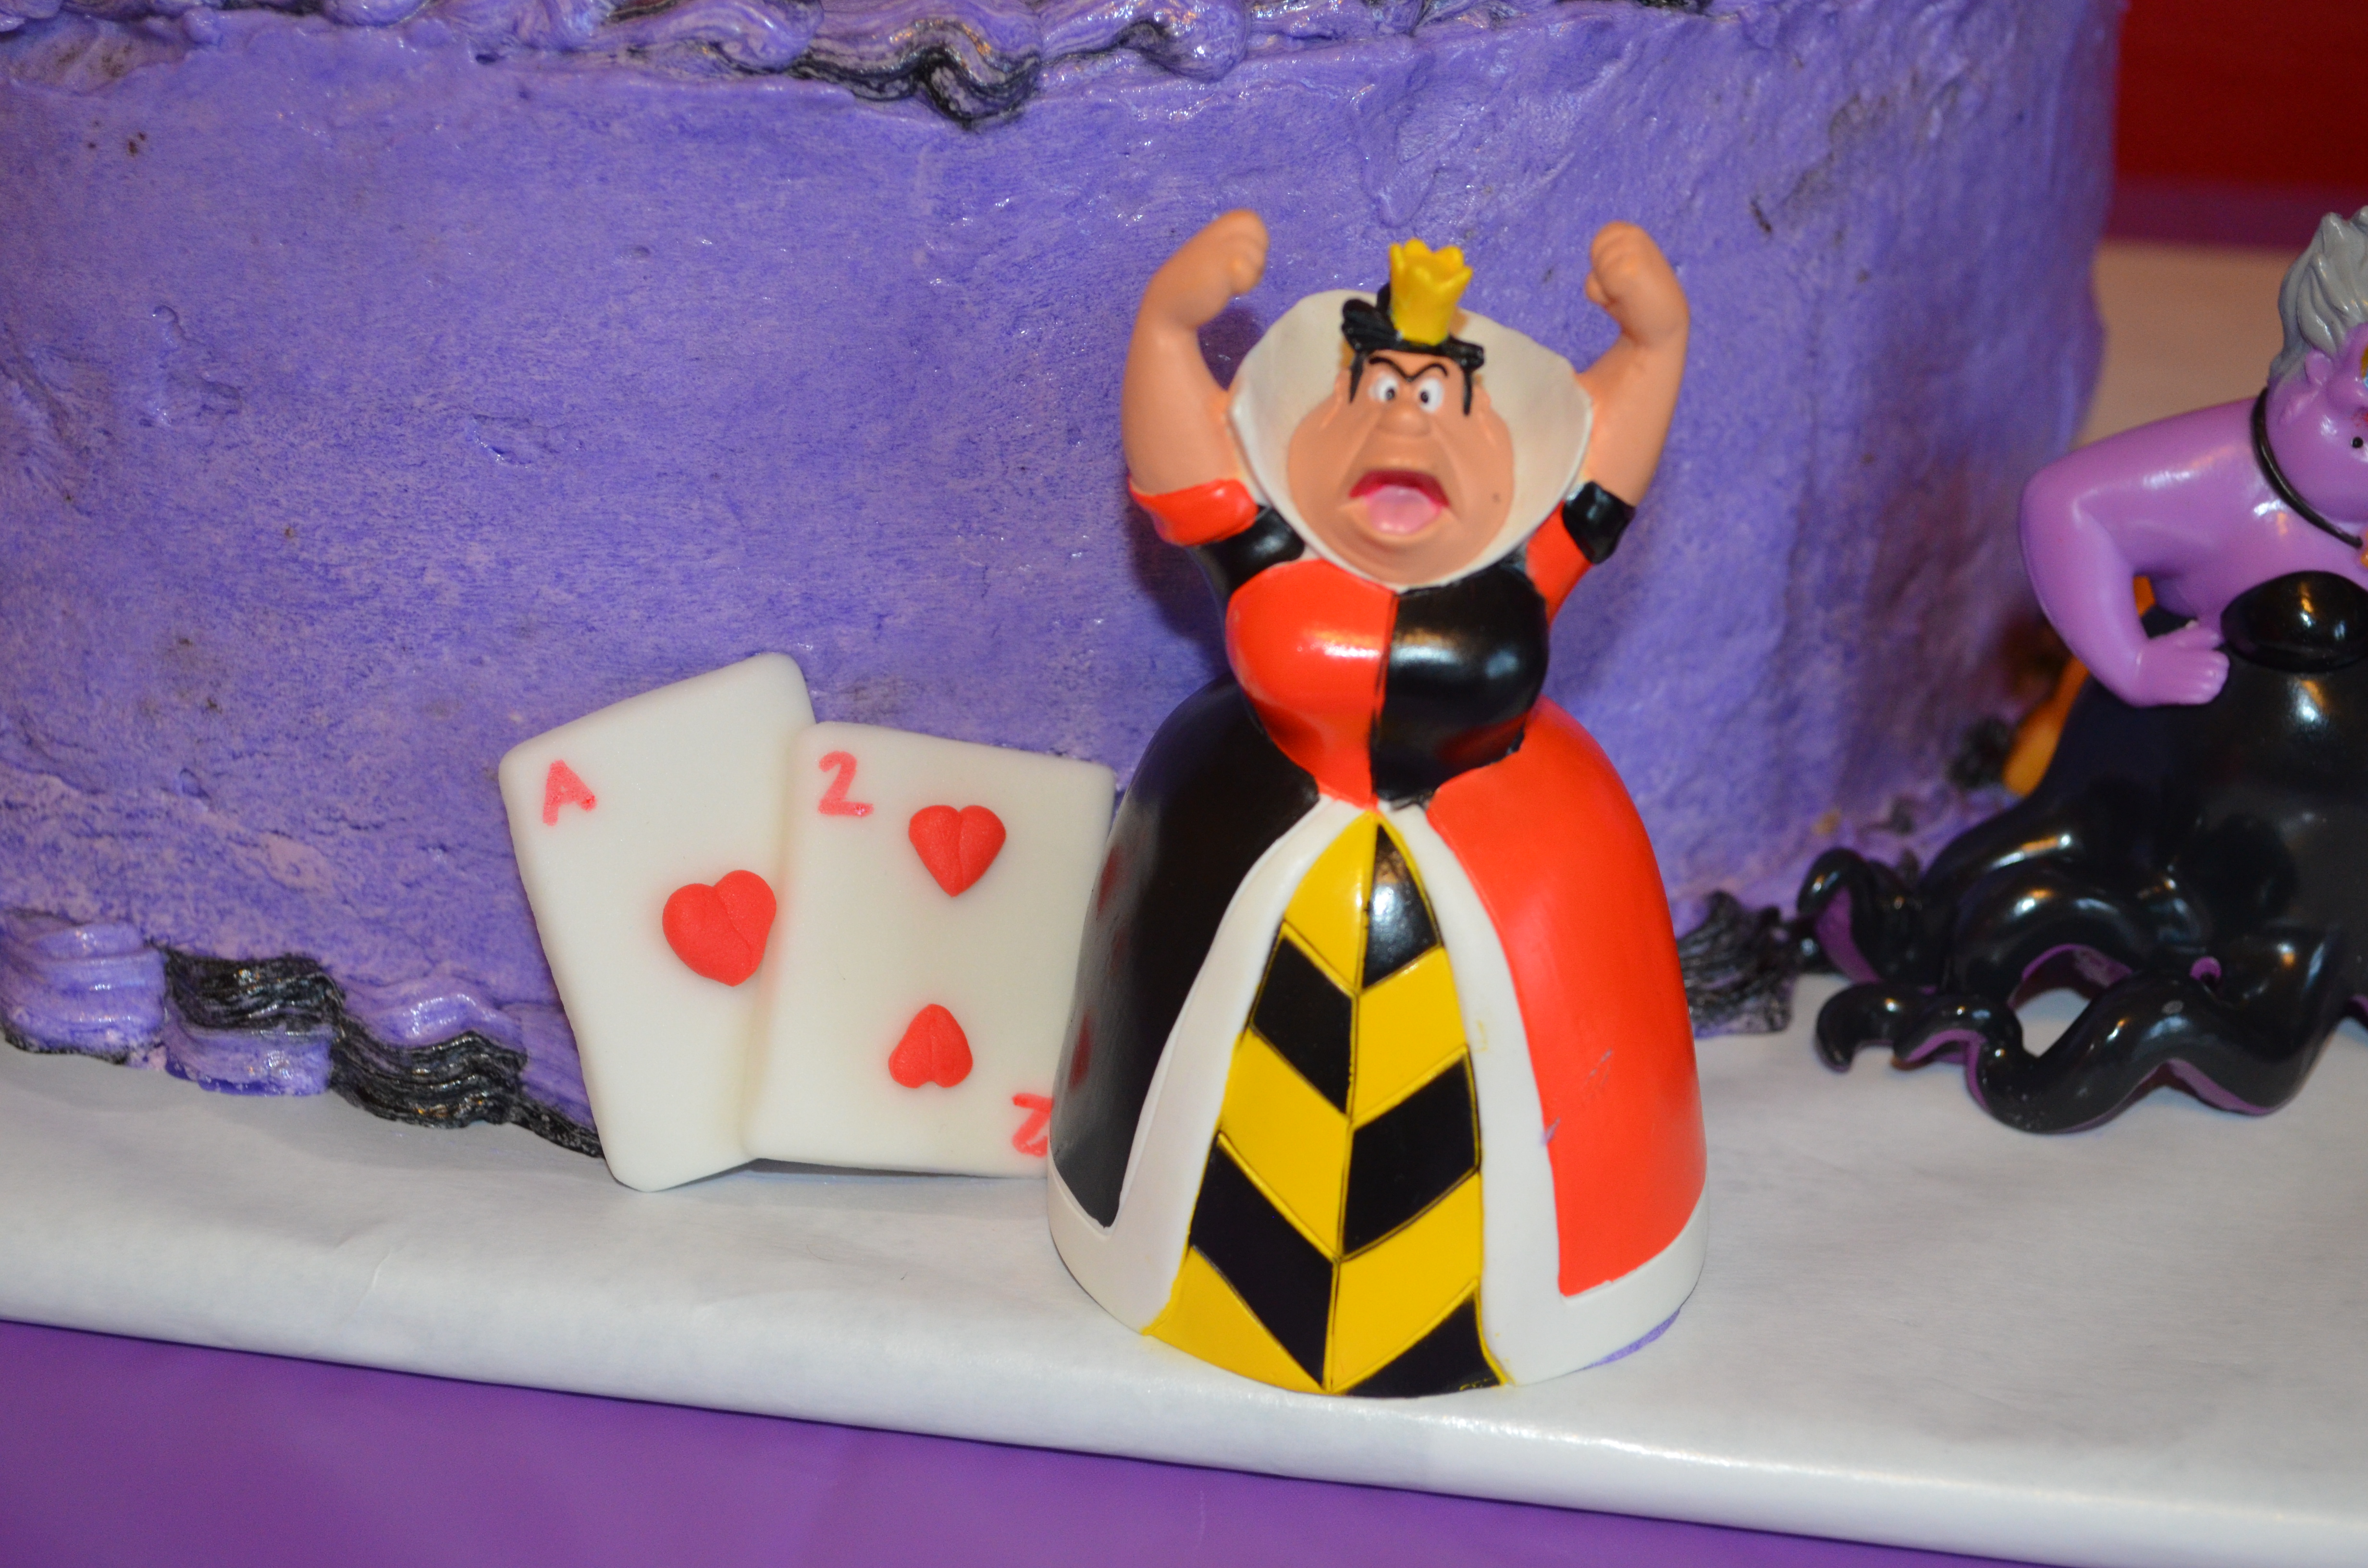 For the Queen of Hearts’ cards, I formed two, white rectangles and red hearts to go on top of them. I used a marker to write the A and 2 in the corners. I just made sure no one ate the parts with marker on it!
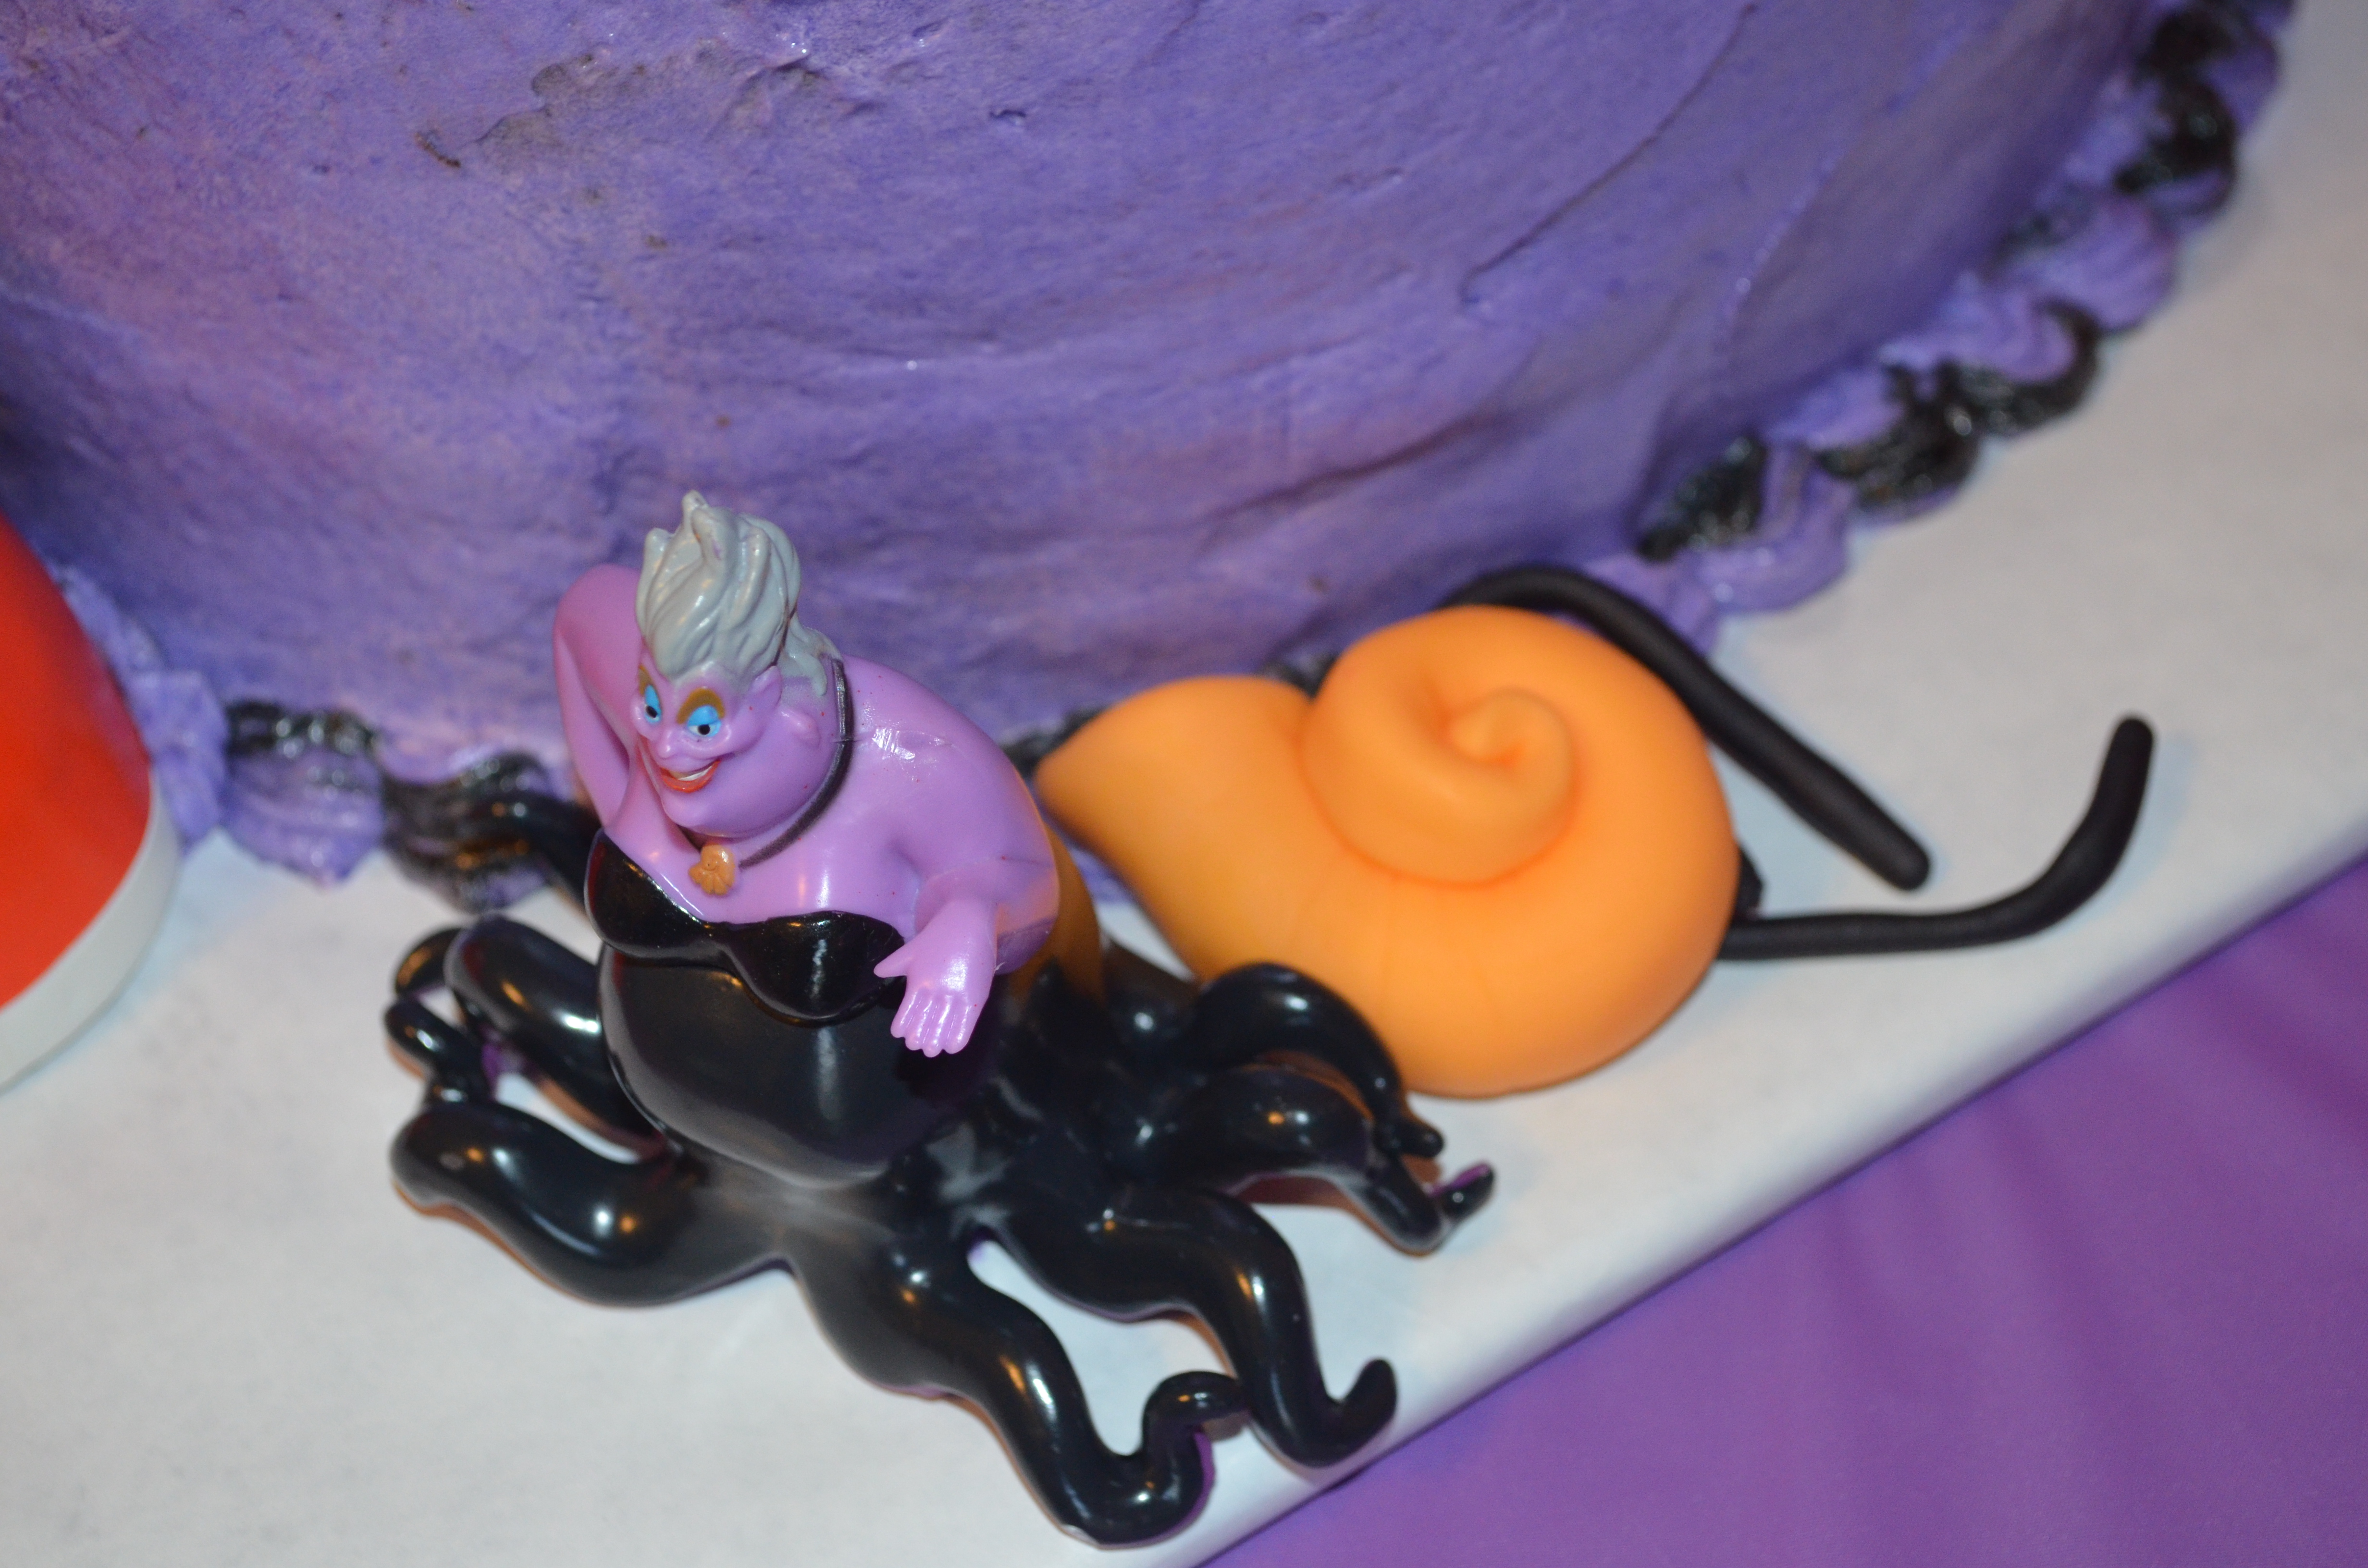 For Ursula’s necklace, I rolled orange fondant like a snake, except I rolled one end more than the other, so it was more of a long cone. Then, I curled it to resemble the shell necklace that Ursula used to hold Ariel’s voice. I used a toothpick to make a few little lines that can be seen on her necklace. I attached long, thin black fondant pieces to be the necklace chain.
 A little bit of time spent sculpting these little pieces made for an impressive cake. They really weren’t very difficult to do.
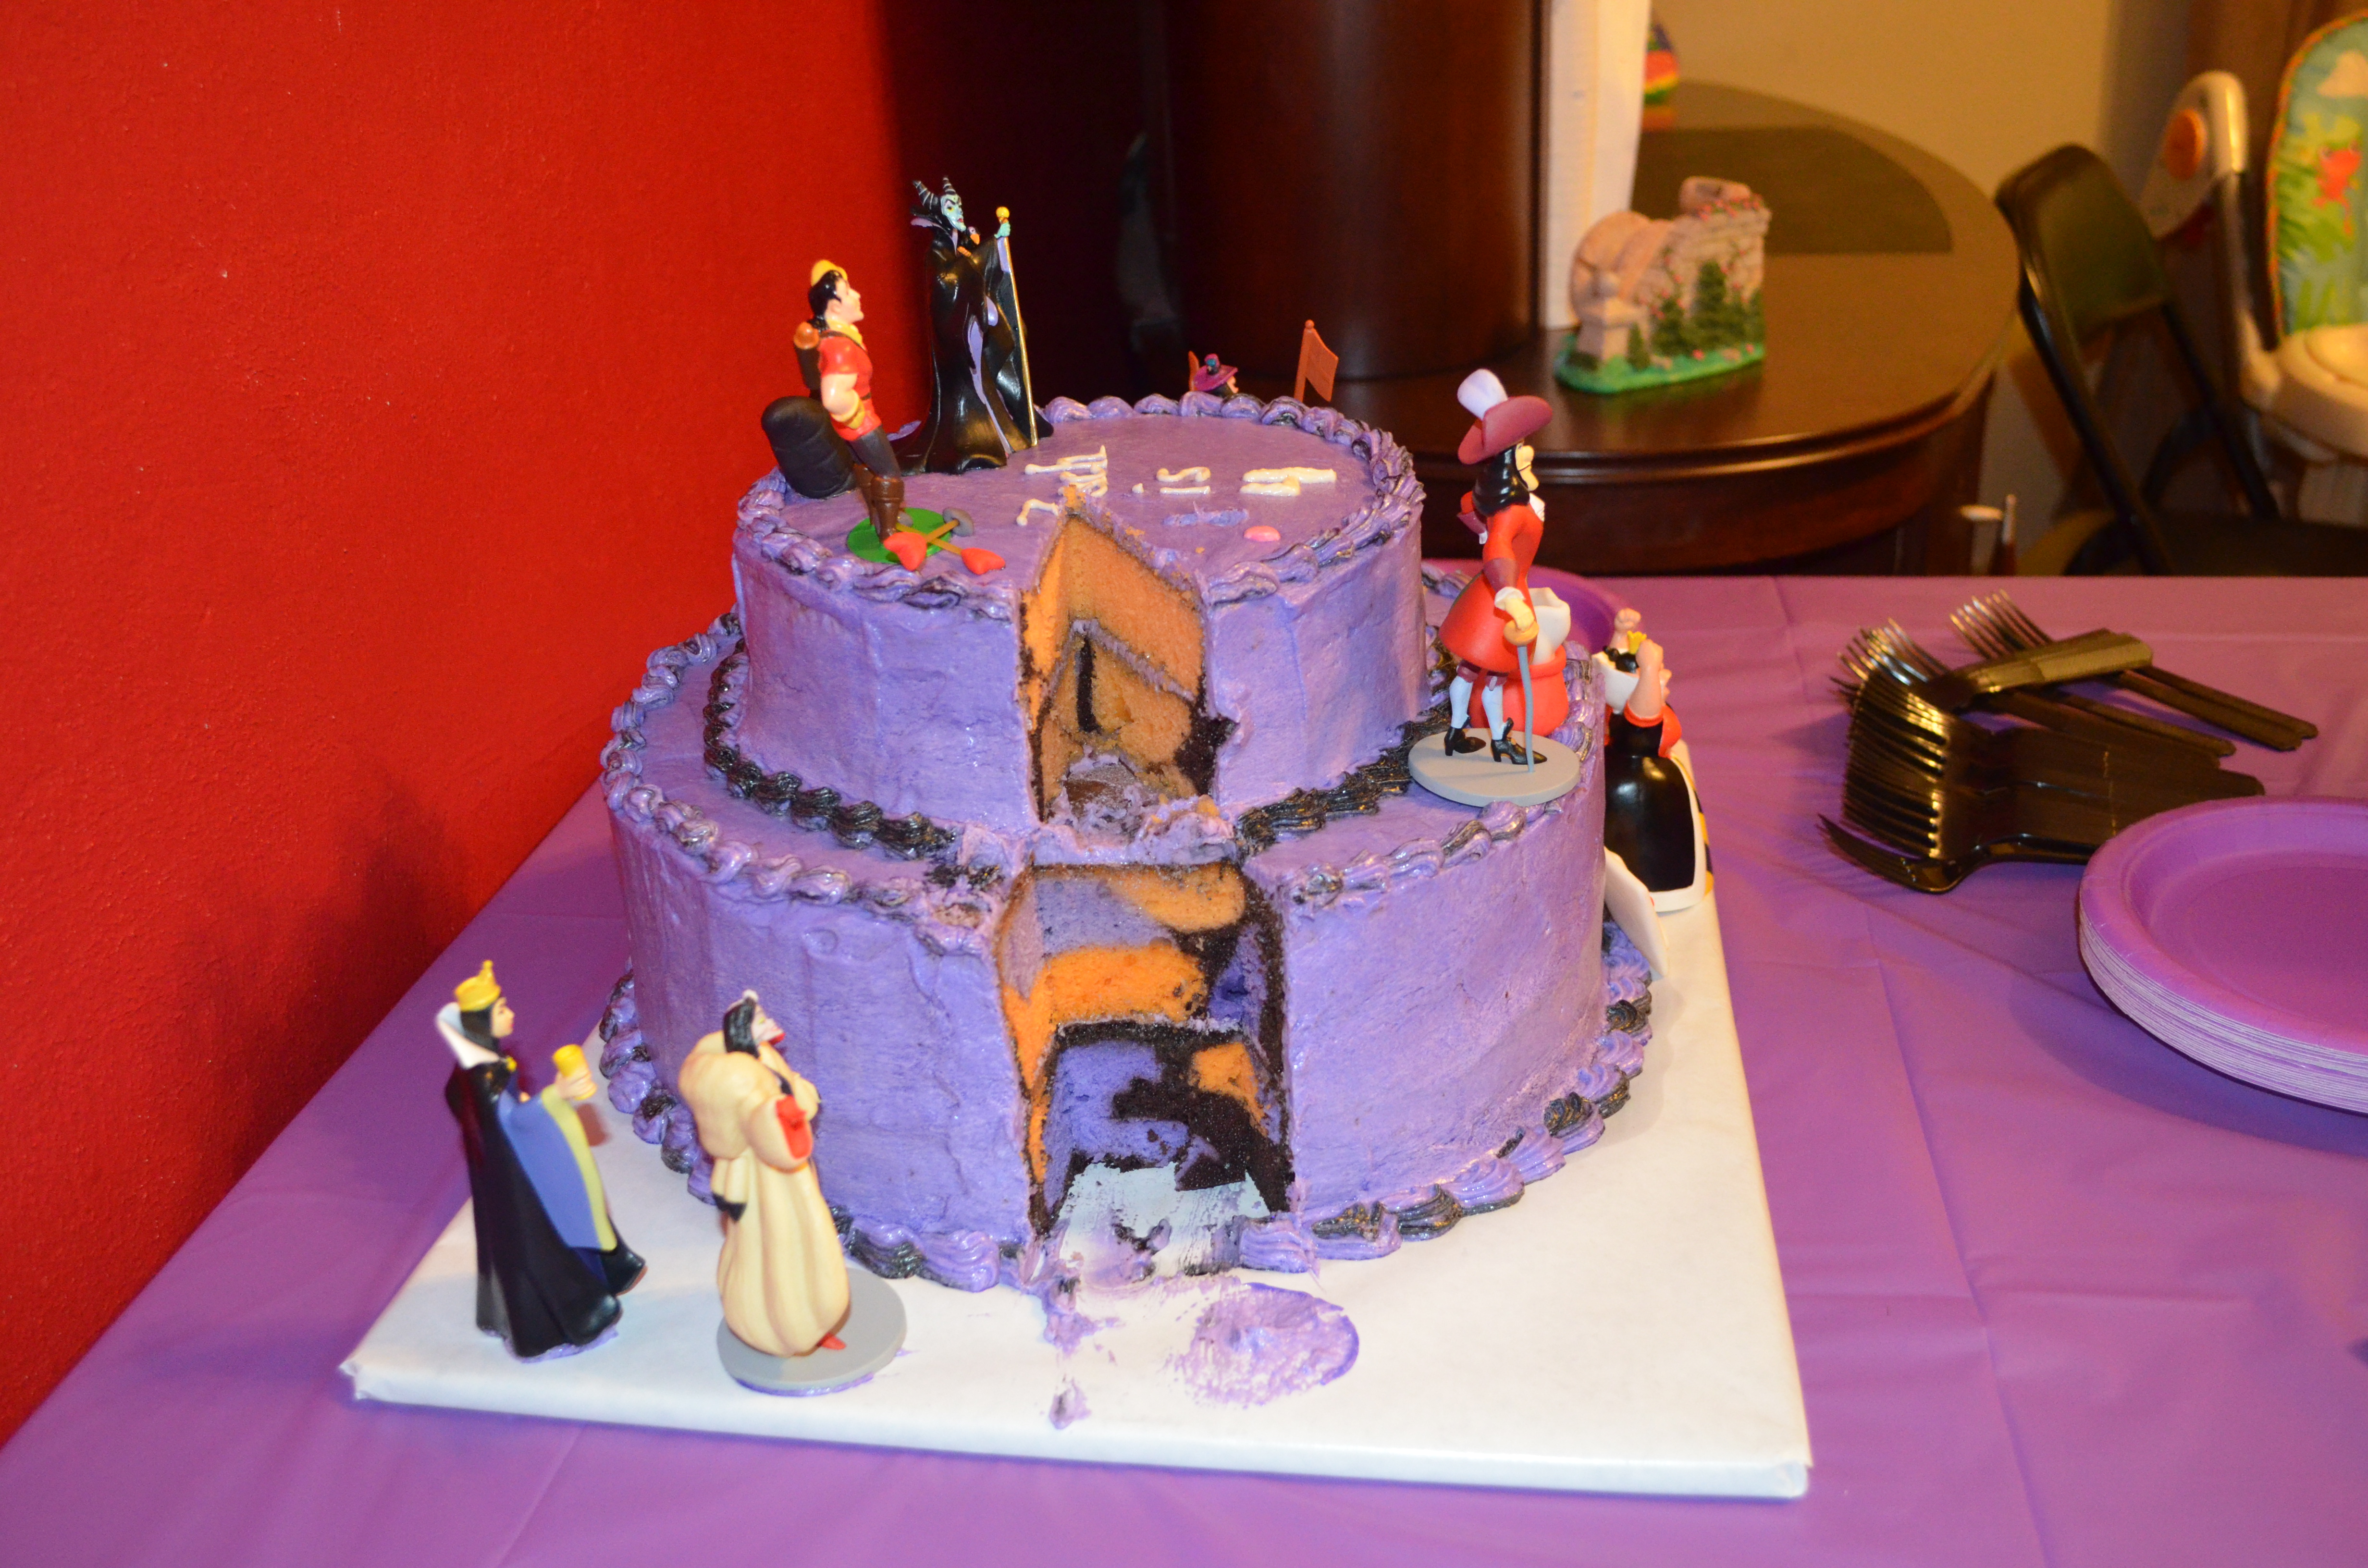
Soon, I will be adding Part 2 of this post to explain how I added the two-toned icing border and colored the inside of the cake with villainous colors. Check back soon or follow me on facebook or Pinterest!
Trackbacks/Pingbacks